Pruning
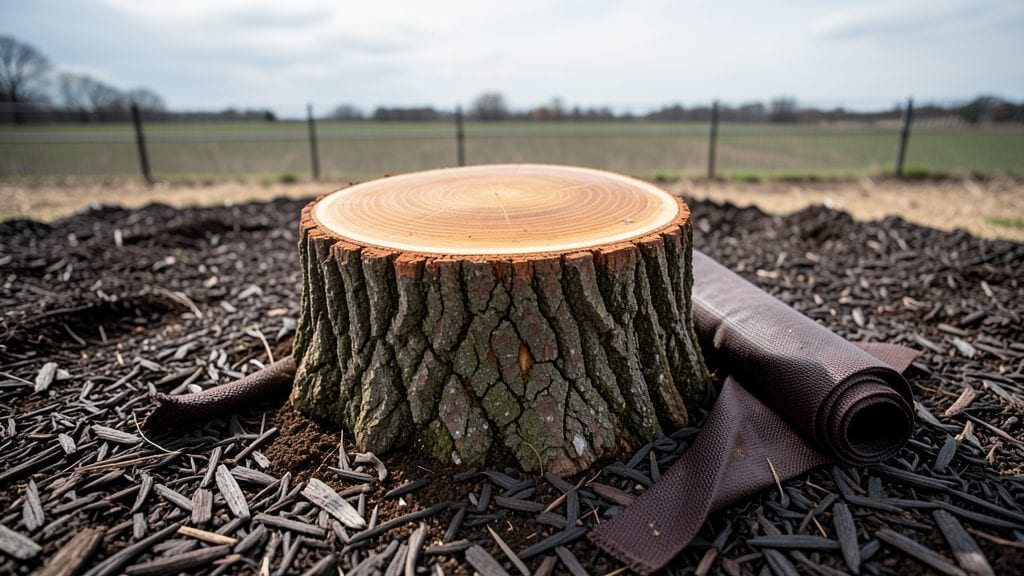
Covering a tree stump isn’t just about hiding an eyesore—it’s about reclaiming space that’s safe, functional, and even beautiful.
I’ve turned multiple stumps into garden features over the years, and the right solution depends on whether you want a low-maintenance ground cover, a small seating nook, or a dramatic focal point.
The key is choosing a method that matches your yard’s style and your willingness to put in upfront effort.
Grinding is the fastest option, but it’s not always practical for large stumps or when you want to keep the area usable immediately. Mulching or planting directly over the stump works surprisingly well—just pick shade-tolerant perennials or shrubs that thrive in the compacted soil.
For something more creative, consider a raised garden bed or a small bench built right over the stump, blending utility with design. Each approach has its own cost and time commitment, but none require advanced skills.
What you end up with is a space that feels intentional, not like an afterthought. A well-chosen ground cover softens the area naturally, while a planted stump becomes a mini-garden that adds texture and color.
Even a simple mulch pile can break up a lawn’s monotony. The best part? Once established, these solutions need minimal upkeep—just occasional weeding or pruning to keep them looking their best.
Ready to transform that stump into something useful? The method you choose depends on your yard’s layout, your budget, and how much effort you’re willing to invest upfront.
Start with the option that fits your priorities, and you’ll have a solution that lasts for years without looking like a temporary fix.
📚 In This Guide
- What you need
- Instructions
- Tips and common mistakes
- Wrapping up and next steps
What you need
- ● Safety gear: Work gloves (heavy-duty, cut-resistant)
- ● Safety goggles
- ● Ear protection (if using power tools)
- ● Measuring & marking tools: Tape measure (25+ feet)
- ● Spray paint or chalk (for marking)
- ● Digging & leveling tools: Shovel (flat and pointed)
- ● Matlock or digging bar
- ● Wheelbarrow (for hauling debris)
- ● Level (2+ feet long)
- ● Filling & covering materials (choose one primary option): Concrete mix: 60+ lbs (pre-mixed, fast-setting)
- ● Gravel or crushed stone: 2–3 cubic feet (½”–¾” size)
- ● Mulch or wood chips: 3–5 bags (cypress or pine recommended)
- ● Landscape fabric: 4’ x 6’ sheet (for weed barrier)
- ● Finishing tools: Trowel (for smoothing concrete)
- ● Plate compactor (for gravel)
- ○ Landscape edging (optional but helpful for clean lines)
- ● Stump grinder rental (if stump is large or stubborn)
- ● Post-hole digger (for deeper stump removal)
- ● Waterproof membrane (to prevent moisture wicking in concrete)
- ● Decorative rocks or pavers (for aesthetic upgrades)
- ● Moss or ground cover seeds (for natural, low-maintenance options)
Step-by-Step guide to covering tree stumps permanently
Turn that eyesore into a functional or decorative feature with these lasting solutions.
Remove Debris and Level the Stump
Start by clearing away any loose bark, roots, or old mulch from the stump using a pruning saw or handsaw. I like to wear gloves for this—tree bark can be surprisingly sharp. Cut through any protruding roots at the base with a clean, sharp motion to prevent future regrowth.
Once the stump is clear, use a level to check for uneven spots. If the top isn’t perfectly flat, smooth it out with a handsaw or chisel. The goal is a stable, even surface for whatever you’ll cover it with. A slight dip or rise won’t ruin the project, but extreme unevenness will make some coverings look unsteady.
Choose and Prepare Your Covering Material
For a permanent solution, you’ll want durable materials like concrete, pavers, or a heavy-duty tree stump cover. Concrete is the most long-lasting but requires mixing and pouring, while pre-made stump covers (often made from recycled plastic or metal) are easier to install. If you’re going the paver route, select stones that are at least 4 inches thick to support weight and prevent sinking.
If using concrete, mix it according to the bag instructions—too much water makes it weak, and too little makes it hard to work with. For stump covers, follow the manufacturer’s guidelines for cutting or assembling the pieces. I’ve found that pre-drilling holes for screws or stakes helps secure the cover tightly to the stump, preventing shifting over time.
Secure the Covering and Finish the Base
Place your chosen covering directly onto the stump, centering it evenly. For concrete, pour the mix into a wooden or plastic form around the stump, tapping it gently to remove air bubbles. Use a trowel to smooth the surface, creating a slight dome shape to shed water. For pavers or covers, secure them with screws or stakes driven into the stump at a 45-degree angle for extra stability.
Once the covering is in place, add a layer of landscape fabric around the base to prevent weeds from growing up against it. Then, fill the surrounding area with 2-3 inches of mulch to blend the stump into the landscape. This step is often overlooked, but it keeps the area looking neat and reduces maintenance. Water the mulch lightly to help it settle.
Reinforce and Maintain for Long-Term Results
After 24 hours, check the covering for any cracks or gaps, especially with concrete. If you spot any, fill them with a matching caulk or additional concrete mix. For pavers or stump covers, ensure they’re still level and haven’t shifted. Over time, stumps can settle slightly, so a quick check every few months keeps everything secure.
To extend the life of your covering, avoid placing heavy objects directly on it—even if it’s reinforced, concentrated weight can cause damage. If you’re using a decorative cover, consider adding a small plant or ornamental feature on top to make it a focal point in your yard. This turns the stump into a functional or aesthetic asset instead of an afterthought.
Tips & tricks for perfect tree stump covering
A few simple tricks will help you avoid common mistakes and create a stump cover that lasts for years.
Safety First: In Step 1, when removing bark and roots, wear heavy-duty gloves and safety glasses. Tree stumps often have sharp edges and hidden splinters from old tools. I learned this the hard way after getting a painful splinter in my thumb—trust me, prevention is worth the few extra seconds. Also, use a pruning saw with a sharp blade to make cutting roots easier and reduce the risk of the saw slipping.
Material Selection Tip: For Step 2, if you're using concrete, consider adding a small amount of fiber mesh to the mix. This prevents cracking as the concrete cures and extends its lifespan. For pre-made covers, choose ones with built-in drainage holes—this prevents water buildup underneath that can cause rot or shifting over time. I've seen stump covers fail within months when they trap moisture against the wood.
Leveling Secret: Before placing your covering, take an extra minute to check the stump's level in multiple directions. A slight tilt won't ruin everything, but extreme unevenness can cause your covering to look crooked or even crack. I use a long straightedge instead of just a level for this check—it gives me a better visual of any major imperfections that need smoothing.
Long-Term Stability: In Step 3, when securing pavers or covers, drive stakes at a 45-degree angle into the stump. This creates more resistance against pulling out than straight-down stakes. For concrete, use a rubber mallet to gently tap the form after pouring—this helps remove air bubbles that could weaken the structure. After the 24-hour check in Step 4, I recommend adding a waterproof sealant to concrete covers to protect against weather damage.
Pro Tips for Cover Up A Tree Stump
- A few simple tricks will help you avoid common mistakes and create a stump cover that lasts for years.
- Safety First: In Step 1, when removing bark and roots, wear heavy-duty gloves and safety glasses.
- Material Selection Tip: For Step 2, if you're using concrete, consider adding a small amount of fiber mesh to the mix.
Frequently asked questions
Got questions about covering up tree stumps? You’re not alone! Here are some common concerns—and straightforward answers—to help you make the best choice for your yard.
What’s the best way to cover a tree stump permanently?
For a long-lasting solution, consider concrete, pavers, or a decorative planter. These options are durable, weather-resistant, and can even enhance your landscape. Avoid mulch or wood chips—while they hide the stump temporarily, they won’t stop regrowth and may attract pests.
How long does it take for a covered stump to stop sprouting?
If you’re using a chemical stump remover (like potassium nitrate), sprouts may reappear for 6–12 months before fully dying. For physical removal (grinding or digging), regrowth is unlikely if the stump is completely severed below ground. Always double-check for roots!
Is covering a stump cheaper than removing it?
Yes! Covering (e.g., with pavers or a garden bench) costs $50–$300, while removal (grinding or digging) can run $100–$500+. If the stump is small or in a low-traffic area, covering is the budget-friendly winner—but factor in long-term maintenance (like sealing concrete).
Can I plant flowers or shrubs over a covered stump?
A raised planter or garden bed over a stump creates a stunning focal point. Just ensure the stump is fully treated or removed first—no buried roots sneaking through! Use lightweight soil and add drainage to keep plants happy.
What if my DIY cover looks uneven or messy?
No worries! Troubleshooting tips:
- Uneven concrete? Use a level and add a gravel base for stability.
- Pavers sinking? Compact the soil beneath them or add a sand layer.
- Mold or stains? Clean with vinegar or bleach solution and reseal if needed.
Wrapping up and next steps
Covering up a tree stump doesn’t have to be a daunting task—with the right materials and techniques, you can transform it into a functional or decorative feature that lasts for years.
Whether you choose a grill station, planter, or artistic installation, your yard will gain both charm and value. Now that you’re equipped with the knowledge, grab your tools and get creative!
Ready to take the next step? Sketch a design, gather your supplies, and turn that stump into something extraordinary. Your outdoor space—and future BBQs—will thank you! 🌱✨