Propagation
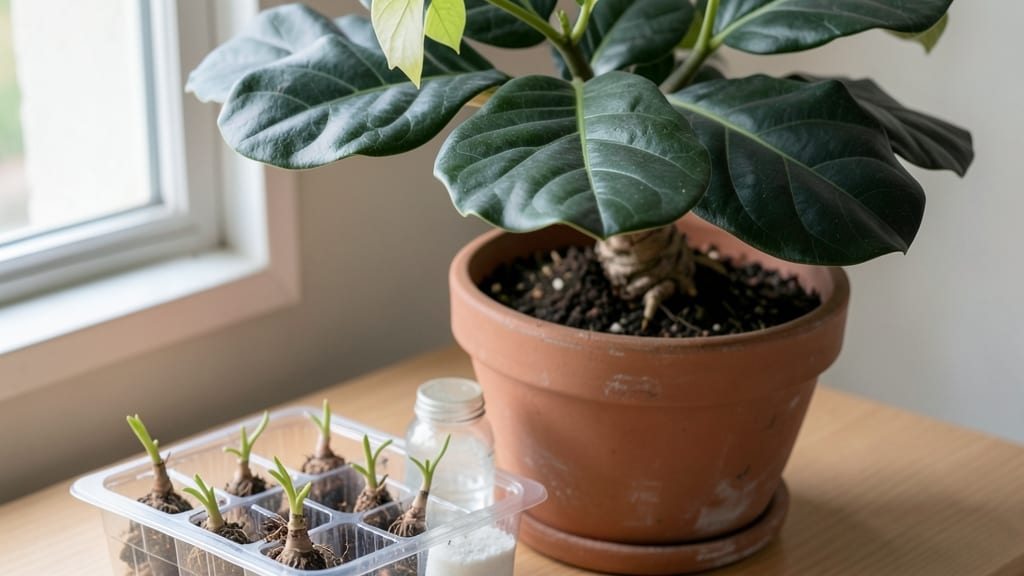
**This simple fiddle leaf fig tree propagation trick turns pruning waste into thriving plants—just add water and patience, and watch roots sprout after weeks of waiting.** 🌱 gardeners think, though it does require patience.
The key lies in selecting the right stems, keeping them hydrated without drowning them, and creating the perfect humidity cocoon.
You’ll only need a few tools: sharp pruning shears, a clean jar of water, and a spot with bright, indirect light. No fancy rooting hormones or sterile soil required—just clean cuts, fresh water changes every few days, and a little luck.
The real secret? Choosing healthy stems with at least two nodes (those little bumps where leaves grow) gives you the best chance of success.
Within 6-8 weeks, you’ll see tiny white roots unfurling from the stem—proof that your cutting is taking hold. Once roots reach 2-3 inches, you can transplant into well-draining soil, where the new plant will grow with the same dramatic foliage as its parent.
The best part? You’ll have a backup plant (or a gift for a fellow fig lover) without spending a dime.
This method works year-round, but spring and summer give the fastest results. Just avoid overwatering, keep the jar out of direct sunlight, and resist the urge to move the cutting too soon—patience pays off with a thriving fiddle leaf fig that’ll be the star of any room.
📚 In This Guide
- What you need
- Instructions
- Tips and common mistakes
- Wrapping up and next steps
What you need
- ● Healthy fiddle leaf fig stem cuttings: 4–6 inches long, with at least 2–3 leaf nodes (avoid flowering stems).
- ● Sharp pruning shears or clean knife: Sterilized with rubbing alcohol to prevent disease.
- ● Clean water: Filtered or distilled (tap water can harm cuttings over time).
- ● Clear glass or jar: At least 8–12 oz capacity (to monitor root growth).
- ○ Rooting hormone (optional but helpful): A powder or gel to encourage faster root development.
- ○ Small pebbles or activated charcoal (optional): 1–2 tbsp to keep water fresh and deter bacteria.
- ● Spray bottle with water: For misting cuttings to maintain humidity.
- ○ Plastic bag or humidity dome (optional): To create a mini greenhouse effect.
- ● Patience: Root growth can take 4–8 weeks—consistency is key!
- ● Bright, indirect light: Place cuttings near a window (but avoid direct sun).
- ● Warmth: Ideal temperature: 65–75°F (18–24°C).
- ● Clean workspace: Disinfect surfaces to avoid contaminating cuttings.
Step-by-Step instructions for fiddle leaf fig tree propagation
Here’s how to grow new fiddle leaf figs from cuttings—simple, reliable, and perfect for expanding your collection.
🌱 Step 1: Select and Prepare the Stem Cutting
Choose a healthy, mature stem with at least 4-6 leaves—the more leaves, the better chance for root growth. Use clean, sharp pruning shears to make a 45-degree cut just below a leaf node (that little bump where leaves attach). This angled cut gives you more surface area for roots to form later.
Remove the bottom two leaves so they won’t rot in water. If the stem is long, you can cut it into 3-4 inch sections, each with its own leaf node. Let the cut end sit for 5-10 minutes to callus over—this prevents rot when you place it in water. I like to work near a window while I prep, so I can check the stem’s health as I go.
💧 Step 2: Place the Cutting in Water
Fill a clean glass or jar with room-temperature water—never tap water, as chlorine can inhibit root growth. Submerge the cut end of the stem 1-2 inches deep, making sure no leaves touch the water (that’s a fast track to mold). I use a small vase because it’s easier to monitor water levels and root progress.
Change the water every 3-4 days to keep it fresh and oxygenated. Place the cutting in bright, indirect light—a spot near an east-facing window works best. You’ll see tiny bubbles forming at the cut end within a few days—that’s a great sign! Roots should appear in 4-8 weeks, depending on your home’s humidity and light.
☀️ Step 3: Encourage Root Growth and Monitor Progress
Once roots reach 1-2 inches long, it’s time to consider transplanting—but don’t rush! Wait until they’re at least 2 inches for the best chance of survival. During this time, keep the water level consistent; roots need steady moisture but not stagnant water. If the water gets murky, that’s a sign it’s time for another change.
Watch for yellowing leaves—this usually means too much light or old water. If you see black spots on the water’s surface, that’s mold, and you’ll need to rinse the roots and refresh the water immediately. I’ve found that fiddle leaf fig cuttings root fastest in warmth (70-75°F), so a sunny windowsill is ideal.
🪴 Step 4: Transplant to Soil When Ready
When roots are 2-3 inches long, gently remove the cutting from the water and rinse off any algae or debris. Fill a 4-6 inch pot with well-draining potting mix (a blend of peat, perlite, and bark works well). Make a small hole in the center, place the cutting in, and firm the soil around it—don’t bury the leaves. Water lightly to settle the soil.
Keep the new plant in bright, indirect light for the first week and avoid overwatering. The transition to soil can be stressful, so mist the leaves occasionally to maintain humidity. After 4-6 weeks, you’ll see new growth, and your cutting will be thriving as a full-fledged fiddle leaf fig!
Tips & tricks for perfect fiddle leaf fig propagation
Here's what I've learned from years of fiddle leaf fig propagation—these little tricks make all the difference between success and disappointment!
The Cutting Angle Matters: That 45-degree cut in Step 1 isn't just decoration—it's science! The larger surface area from the angled cut gives roots more room to form. I've tried straight cuts, and they always root slower. Use a ruler as a guide if you're not comfortable eyeballing the angle. The extra effort pays off when you see those roots sprouting faster.
Callusing is Non-Negotiable: Those 5-10 minutes of callusing time in Step 1 might feel like forever, but trust me on this. The callus layer seals the cut end and prevents rot when submerged in water. I once skipped this step with a cutting, and within days it turned black and mushy. Pro tip: Place your cutting on a paper towel while it calluses—it absorbs any excess moisture that could cause rot.
Light is Everything: Bright, indirect light in Step 2 is crucial—direct sun will scorch those delicate leaves. I've found east-facing windows work best in most homes. If you don't have good natural light, a grow light on a timer (12-14 hours daily) can work wonders. Watch for yellowing leaves as your first sign something's off with the light conditions.
Water Quality and Frequency: The 3-4 day water change schedule in Step 2 is perfect for preventing mold and bacteria. I've learned to use filtered water or let tap water sit out overnight to evaporate chlorine. And here's a secret: Add a drop of hydrogen peroxide (3%) to the water when you change it—it keeps the water fresh and helps prevent algae growth between changes.
Pro Tips for Fiddle Leaf Fig Tree Propagation
- Here's what I've learned from years of fiddle leaf fig propagation—these little tricks make all the difference between success and disappointment!
- The Cutting Angle Matters: That 45-degree cut in Step 1 isn't just decoration—it's science!
- Callusing is Non-Negotiable: Those 5-10 minutes of callusing time in Step 1 might feel like forever, but trust me on this.
Frequently asked questions
Got questions about propagating your fiddle leaf fig? You’re not alone! Here are some of the most common concerns—and their straightforward answers—to help you grow confidently.
How long does it take for fiddle leaf fig cuttings to root in water?
Be patient—root growth can take anywhere from 2 to 6 weeks, depending on conditions like light, water temperature (warm is best!), and humidity. Check for tiny white roots peeking from the nodes; once they’re 1-2 inches long, your cutting is ready to plant!
Why is my cutting rotting in water?
Rotting usually means too much water or poor hygiene. Change the water every 3-5 days and use a clean jar or vase. Also, ensure only 1-2 nodes are submerged—more can lead to bacterial growth. If you see black or mushy spots, trim the affected area and refresh the water immediately!
Can I propagate a fiddle leaf fig from a leaf instead of a stem?
Nope! Fiddle leaf figs cannot root from a single leaf—they need a stem with at least 1-2 nodes (those little bumps where leaves grow). A leaf cutting will just wither. Stick to stem cuttings for success!
What’s the best time of year to propagate my fiddle leaf fig?
The ideal window is spring or early summer (March–June), when the plant is actively growing. Avoid winter dormancy—cuttings taken then may struggle to root. Even in other seasons, healthy growth is key!
Should I use rooting hormone for water propagation?
Not necessary! Fiddle leaf figs root easily in plain water without hormones. However, if you’re impatient, a gentle dip in rooting hormone (like cinnamon powder or a commercial formula) can speed things up slightly. Just avoid overdoing it—less is more!
What do I do after my cutting roots in water?
Once roots hit 1-2 inches, it’s time to transition to soil! Gently plant your cutting in well-draining potting mix, water lightly, and place it in bright, indirect light. Keep humidity high for the first few weeks to ease the shock.
Wrapping up and next steps
Growing your own fiddle leaf fig tree from a cutting is a rewarding journey—one that blends patience with the joy of nurturing new life! 🌱 Whether you’re using water or soil, the key is consistency: bright, indirect light, warm temperatures, and a little tender love.
Your new plantlet may take weeks to show roots, but every step is progress.
Ready to take the next leap? Once your cutting thrives, transplant it into soil and watch it flourish into a stunning centerpiece. Share your progress with fellow plant parents—your green thumb is inspiring! 🌿✨