Propagation
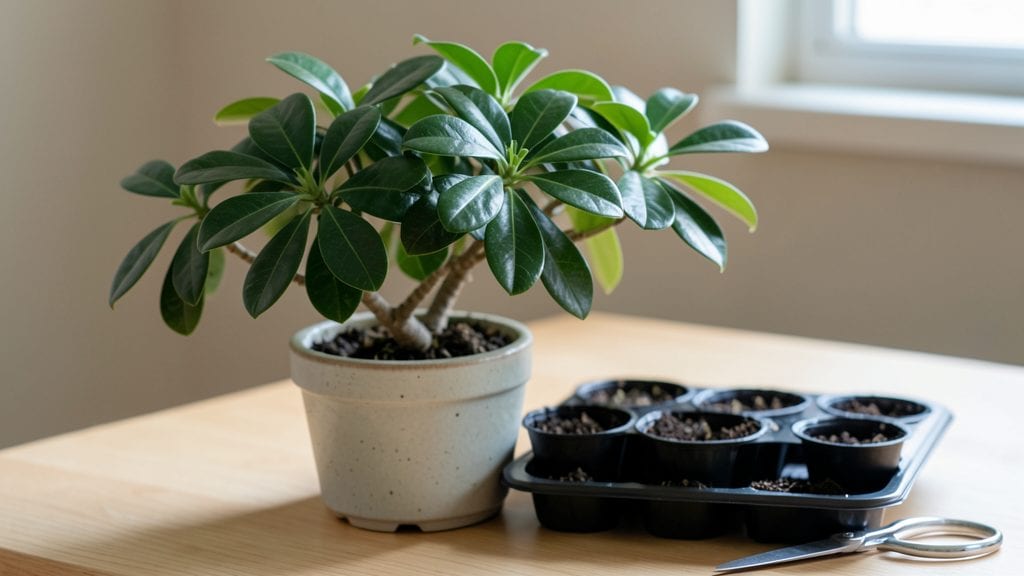
Mastering dwarf umbrella tree propagation isn’t just possible—it’s shockingly fast when you do it right. ✨ I’ve watched new roots sprout in just two weeks with the right method, turning a single plant into a small grove of lush greenery. without buying a thing.
The key is patience and knowing exactly when to cut, which stem to choose, and how to keep those delicate roots happy until they’re strong enough to stand on their own.
You only need three simple tools: sharp pruning shears, a small pot with drainage, and a mix of perlite and potting soil. The best time to propagate is in spring or early summer, when the plant is actively growing and can handle the stress of being cut back.
Here’s the secret: choose a healthy stem with at least three leaves and a node—this is where the magic happens, and where those first roots will appear.
Within four to six weeks, you’ll have sturdy new plants ready to transplant. The foliage stays vibrant, the growth is dense, and you’ll avoid the heartbreak of store-bought trees that struggle to adapt.
Plus, you’ll save money and end up with more trees than you know what to do with—perfect for gifting or filling out your indoor jungle.
Whether you’re a beginner or a seasoned propagator, this method works in bright, indirect light and scales from a single cutting to a whole collection. Let’s get those roots growing!
📚 In This Guide
- What you need
- Instructions
- Tips and common mistakes
- Wrapping up and next steps
What you need
- ● Healthy dwarf umbrella tree (Schefflera arboricola) – Choose a mature plant with at least 3-4 stems and flexible branches.
- ● Sharp, sterile pruning shears – Must be clean to prevent disease (rubbing alcohol works for sterilization).
- ○ Rooting hormone (optional but recommended) – A gel or powder formulation (e.g., Clonex or Dip ’N Grow).
- ● Plastic or metal clips – 2-3 per branch (e.g., bent wire, twist ties, or commercial propagation clips).
- ● Well-draining potting mix – A blend of 50% perlite/sand and 50% peat moss or coconut coir for aeration.
- ● Small pots or trays – 3-4 inch diameter with drainage holes (one per cutting).
- ● Clear plastic bags or domes – To create a humid environment (e.g., zip-top bags with holes or propagation domes).
- ● Spray bottle with water – For misting (use room-temperature, filtered water).
- ● Grow lights or bright indirect sunlight – 6-8 hours daily (south-facing window or LED grow lights).
- ● Humidity tray – Elevate pots above water-filled trays with pebbles to boost moisture.
- ● Fertilizer (diluted) – Balanced liquid fertilizer (5-5-5) after roots form (4-6 weeks).
- ● Heat mat – Keeps soil 70-75°F for faster rooting (great for cooler climates).
- ● Journal/notebook – Track progress (dates, humidity, root growth).
Step-by-Step guide to propagating dwarf umbrella trees through layering
Here’s how to multiply your dwarf umbrella tree quickly—without the fuss of cuttings or waiting for seeds.
🌿 Step 1: Select the Right Branches for Layering
Choose healthy, flexible branches that are 12-18 inches long and still attached to the parent plant. Look for stems that aren’t too thick (about ¼ inch in diameter)—thinner branches root faster. Avoid branches with flowers or fruit, as they’ll slow down root development. I like to pick branches that are slightly lower on the tree, where they’ll have more stored energy.
Gently bend the selected branch downward until it’s 4-6 inches from the ground. You’ll hear a slight crack or feel resistance—this is the spot where new roots will form. If the branch is too stiff to bend, skip it and try another. The goal is to create a gentle curve, not a sharp break.
✂️ Step 2: Create the Wound and Secure the Layer
About 2-3 inches from the tip of the bent branch, make a small, clean cut (½ inch deep) on the underside of the stem. This wound exposes the inner tissue, which triggers root growth. Use sharp pruners or a knife to avoid tearing the bark. I like to angle the cut slightly downward to help water run off and prevent rot.
Next, secure the wounded section to the soil using a U-shaped wire bent from a coat hanger or a plastic plant tie. Gently tuck the branch into a small hole in the soil, covering the wounded area completely. Press the soil around it lightly—you want good contact but no air pockets. The branch should stay in place without struggling.
💧 Step 3: Maintain Moisture and Light for Root Development
Keep the soil around the layered branch consistently moist but not soggy—think of it as damp like a wrung-out sponge. Water lightly every 2-3 days, checking the top inch of soil with your finger. If it’s dry, water again. Too much water will suffocate the roots, while too little will stall growth. A 1-gallon spray bottle works great for gentle watering.
Place the layered branch in bright, indirect light—like a shaded patio or east-facing window. Direct sun can scorch the new growth, while too little light slows rooting. You’ll know it’s working when you see tiny bumps or nodules forming along the wounded stem in 4-6 weeks. These are the first signs of root development.
🌱 Step 4: Encourage Independence and Prepare for Separation
Once the layered branch has developed 1-2 inches of new roots, it’s ready to become its own plant. This usually takes 8-12 weeks, depending on your climate. You’ll notice the branch thickening slightly and new leaves emerging—signs it’s pulling nutrients from its own roots. I like to check by gently tugging on the base; if there’s resistance, roots are forming.
To separate, use clean pruners to cut the branch just below the new root ball. Fill a small pot with well-draining soil mix and transplant the new plant, keeping the roots covered but not buried too deep. Water thoroughly and place it in the same bright, indirect light for another 2-3 weeks to stabilize.
☀️ Step 5: Transition to Full Sun and Ongoing Care
After 4-6 weeks of recovery, gradually introduce the new dwarf umbrella tree to morning sun for 1-2 hours daily, then slowly increase exposure. Full sun is ideal once established, but sudden exposure can cause leaf scorch. Watch for deep green, glossy leaves—this means your new plant is thriving.
Water when the top 1-2 inches of soil feel dry, and fertilize lightly with a balanced liquid fertilizer every 4-6 weeks during the growing season. Avoid overwatering; these trees prefer to dry out slightly between waterings. With this method, you’ll have 4-6 new plants in just a few months—fast, easy, and stress-free!
Tips & tricks for perfect dwarf umbrella tree layering
A few simple tricks can make all the difference when propagating your dwarf umbrella tree through layering.
Branch Selection Secret: In Step 1, look for branches that are slightly lower on the tree—they contain more stored energy from the parent plant. I always avoid branches with flowers or fruit since they'll divert energy away from root development. The ideal branch should bend easily but not snap—think of it like a willow branch rather than a stiff twig.
Wound Placement Matters: When making your ½-inch deep cut in Step 2, position it about 2-3 inches from the tip where the branch naturally curves. This spot has the highest concentration of growth hormones. I like to angle the cut downward slightly to prevent water from pooling and causing rot—just imagine creating a tiny roof over the wound.
Moisture Management: The consistently moist soil in Step 3 is crucial, but don't drown your layers! I use a spray bottle to mist the soil every 2-3 days rather than pouring water directly. This prevents soil compaction and keeps the roots oxygenated. You'll know you've got the right balance when the top inch feels like a wrung-out sponge—not bone dry, not soggy.
Root Development Timeline: Those 4-6 weeks in Step 3 might feel long, but patience pays off. I check for root formation by gently tugging on the branch—if it resists slightly, roots are developing. You'll also notice tiny bumps along the wounded stem that look like tiny beads. These are your first signs of successful rooting!
Pro Tips for Dwarf Umbrella Tree Propagation
- A few simple tricks can make all the difference when propagating your dwarf umbrella tree through layering.
- Branch Selection Secret: In Step 1, look for branches that are slightly lower on the tree—they contain more stored energy from the parent plant.
- Wound Placement Matters: When making your ½-inch deep cut in Step 2, position it about 2-3 inches from the tip where the branch naturally curves.
Frequently asked questions
Got questions about propagating your dwarf umbrella tree? You’re not alone! Here are answers to the most common concerns—from timing to troubleshooting—to help you layer with confidence.
What’s the best time of year to propagate a dwarf umbrella tree?
Spring or early summer is ideal! The tree’s active growth phase ensures roots form faster. Avoid winter—dormancy slows propagation. If you’re in a warm climate, late summer can work too, but prioritize humidity and shade to mimic natural conditions.
How long does it take for roots to develop during layering?
Patience pays off! With consistent moisture and warmth, roots typically appear in 4–8 weeks. Check by gently tugging the layered branch—if resistance is felt, roots are forming. If not, extend the process with extra humidity or a rooting hormone.
Can I propagate a dwarf umbrella tree from cuttings instead of layering?
Yes, but layering is easier! Cuttings require more precision: use 4–6 inch semi-hardwood cuttings, dip in rooting hormone, and keep them in moist perlite/sand. Layering (air or ground) leverages the tree’s natural energy for faster success.
Why isn’t my layered branch rooting? Troubleshooting tips!
Don’t stress—common fixes include:
- Check moisture: Soil should stay damp but not soggy.
- Verify humidity: Low humidity? Use a plastic bag or tray of water.
- Inspect the wound: The stripped bark must stay exposed—covering it can prevent root growth.
- Light levels: Bright, indirect light speeds up rooting.
If all else fails, try a fresh layer in a few weeks!
How do I know when to separate the rooted layer from the mother plant?
Wait until the new roots are 2–3 inches long and the layer has 3–5 leaves. Test by gently wiggling it—if it resists, it’s ready! Sever with clean pruners, then pot it in well-draining soil. Avoid transplant shock by watering lightly for the first week.
Wrapping up and next steps
Propagating your dwarf umbrella tree through layering is a rewarding way to multiply this stunning plant with minimal effort—and now, you’ve got all the tools to succeed! 🌱 Whether you’re a beginner or a seasoned gardener, this method ensures fast, healthy growth while keeping your space lush and vibrant.
The key? Patience, consistency, and a little creativity.
Ready to turn your green thumb into a green forest? Start by selecting your healthiest branches and follow the step-by-step guide above. Once your new plants take root, transplant them into their forever homes—whether that’s pots, garden beds, or even creative containers.
Happy growing, and may your dwarf umbrella trees thrive for years to come! 🌿✨