
Planting
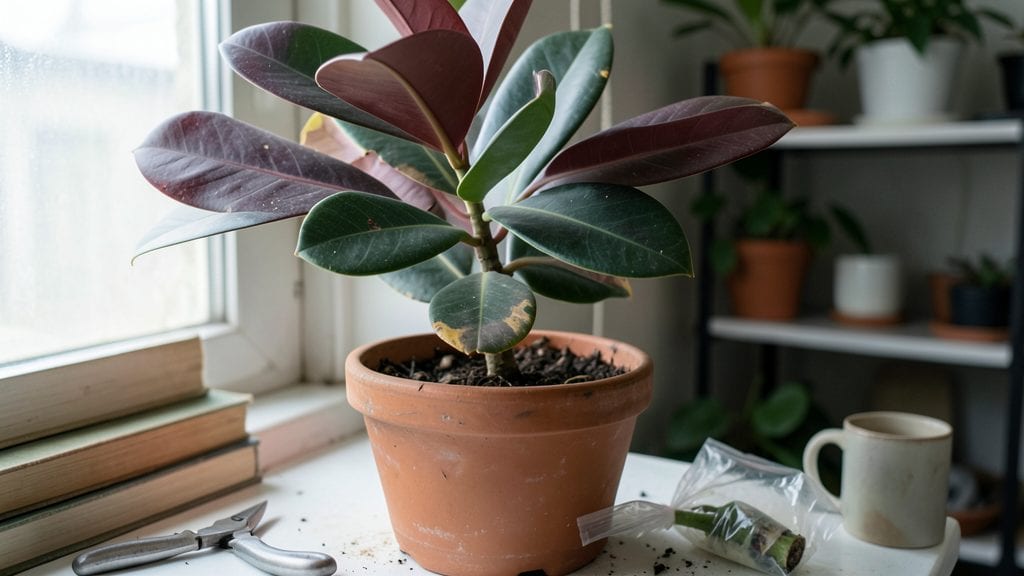
Cutting a rubber tree plant isn’t just pruning—it’s how you get free, thriving new plants while keeping your existing tree bushier and stronger. 🌿 I’ve turned leggy rubber trees into lush, multi-stemmed beauties using this simple method, and you can too.
The key? Timing, sharp tools, and knowing where to make that clean cut.
Spring and early summer are prime times because the plant’s energy is focused on growth, not recovery. You’ll need just a few basic tools: pruning shears, rooting hormone (optional but helpful), and either water or a well-draining potting mix.
The process takes less than 30 minutes, and within weeks, you’ll see fresh new leaves popping out on both your cuttings and the parent plant.
Start by selecting healthy stems—look for ones that are at least 4-6 inches long and pencil-thick. Make your cut just below a leaf node (that little bump where leaves grow) at a 45-degree angle to maximize surface area for roots.
Dip the cut end in rooting hormone if you’re using it, then place the cutting in water or moist soil. Within 4-6 weeks, roots should form, and you’ll have a brand-new rubber tree ready to thrive.
Here’s the best part: your original plant will respond to the pruning by sending out fresh growth from the base, creating a fuller, more balanced shape.
Just keep an eye out for yellowing leaves or mushy stems—those are signs of rot, and adjusting your watering or humidity levels usually fixes the problem. Ready to multiply your rubber tree collection? Let’s get cutting!
📚 In This Guide
- What you need
- Instructions
- Tips and common mistakes
- Wrapping up and next steps
What you need
- ● Pruning shears: Sharp, bypass-style shears (4-6 inch blades) for clean cuts on smaller branches. Disinfect with rubbing alcohol before and after use! 🧴
- ● Hand pruners: For thicker branches (up to ½ inch in diameter). Look for ergonomic handles to avoid hand fatigue.
- ○ Loppers: Optional but handy for branches ¾–2 inches thick. Choose bypass or anvil-style with a ratcheting mechanism for extra leverage.
- ● Gloves: Heavy-duty, cut-resistant gloves (e.g., mechanics’ gloves) to protect from sap and sharp edges.
- ● Rubbing alcohol (70% isopropyl) or hydrogen peroxide: 1 small bottle (4 oz) to sterilize tools and prevent disease spread.
- ○ Pruning sealant (optional): Tree wound dressing (e.g., Tanglefoot Tree Wound Pruning Seal) for cuts larger than ½ inch to reduce sap oozing.
- ● Disposable bags or bucket: 1–2 gallon-sized for collecting pruned branches and leaves.
- ● Ladder or step stool: If your tree is tall (6+ feet). Ensure it’s stable and non-slip.
- ● Timing: Prune during the active growing season (spring or early summer) to encourage new growth. Avoid winter pruning!
- ● Weather check: Choose a dry, overcast day to minimize stress on the plant.
- ● Inspection: Examine the tree for pests (e.g., spider mites, scale) or diseased branches before cutting.
- ● Watering schedule: Water the tree 1–2 days before pruning to ensure it’s hydrated but not waterlogged.
- ● Ventilation: Work in a well-ventilated area—rubber tree sap can irritate skin and lungs.
- ○ Eye protection: Optional but recommended—safety goggles to shield from debris.
- ● Pet/child-free zone: Keep kids and pets away while pruning to avoid accidental cuts or sap exposure.
Step-by-step instructions for pruning your rubber tree plant
Here’s my go-to method for pruning rubber plants that keeps them lush and encourages stronger branches.
✂️ Step 1: Gather the Right Tools and Prep the Plant
Start by cleaning your pruning shears with rubbing alcohol—this prevents spreading disease between cuts. I always use sharp, sterilized tools because dull blades crush stems instead of making clean cuts. Choose a bright, sunny day for pruning; rubber plants recover faster when they’re photosynthesizing actively.
Before you begin, inspect your rubber tree for yellowing leaves or leggy growth. These are your targets—removing them redirects the plant’s energy to healthier areas. Water the plant lightly the day before pruning so the soil is moist but not soggy. You’ll notice the leaves feel slightly plump when you gently squeeze a stem.
✂️ Step 2: Identify and Remove Dead or Weak Growth
Look for branches with brown, crispy leaves or stems that feel mushy when pressed—these are dead and need removal. Cut these back to a healthy green section just above a leaf node (the bump where leaves attach). I angle my cuts slightly downward to prevent water from pooling on the wound, which could rot the stem.
For leggy stems (long, bare branches), trim just above a set of leaves or a leaf node. Avoid cutting too close to the main stem—leave at least ½ inch of healthy growth. You’ll see the plant’s energy shift toward thicker, bushier growth after these cuts.
☀️ Step 3: Shape the Plant for Fullness and Airflow
Step back and visualize your ideal shape—rubber plants respond well to pruning for fullness. Cut back the longest branches by about ⅓ of their length to encourage branching. Make your cuts at a 45-degree angle just above a leaf node, and avoid leaving stubs.
Focus on the top third of the plant first. Removing the highest growth prevents the rubber tree from growing too tall and top-heavy. You’ll notice new side shoots forming within 4-6 weeks as the plant redirects its energy to fill out.
💧 Step 4: Post-Pruning Care for Faster Recovery
After pruning, water the plant deeply to help it recover. I use room-temperature water to avoid shocking the roots. Place the rubber tree in bright, indirect light for the first week—direct sun can stress freshly pruned plants. You’ll see new growth emerging from the cut nodes within 2-3 weeks if conditions are right.
Skip fertilizing for 4-6 weeks after pruning. The plant needs time to heal and establish new growth before absorbing nutrients. If you notice yellowing leaves after pruning, it’s usually normal—just reduce watering slightly until new growth appears.
⏰ Step 5: Monitor and Maintain for Long-Term Health
Check your rubber tree weekly for new growth. Healthy new leaves should be glossy and deep green. If you see slow growth or wilting, increase humidity with a pebble tray or misting—rubber plants thrive in 40-60% humidity.
Prune again in 6-8 months to maintain shape and encourage fullness. Over time, you’ll develop a rhythm: trim leggy growth in spring, shape in summer, and do light maintenance in fall. This keeps your rubber tree compact, strong, and full of life.
Tips & tricks for pruning your rubber tree plant
Here's what I learned after pruning my rubber tree for years—these tricks keep your plant thriving and looking its best.
The Right Time to Prune: Spring is the ideal time to prune your rubber tree because it's when new growth begins. You'll see the plant respond with fresh leaves within 4-6 weeks after pruning. Avoid heavy pruning in fall or winter when the plant is dormant—it won't recover as quickly. I always do my main pruning in early spring and light maintenance in summer.
Tool Precision Matters: Using clean, sharp pruning shears makes all the difference. Dull blades crush stems instead of making clean cuts, which can damage the plant and invite disease. I keep a small bottle of rubbing alcohol handy to sterilize my tools between cuts—this prevents spreading sap-borne diseases between branches. For thicker stems, I use a small pruning saw for cleaner cuts.
Visual Cues for Healthy Cuts: When making your cuts, look for the leaf nodes—the small bumps where leaves attach. Cutting just above a leaf node encourages new growth from that spot. For shaping, make your cuts at a 45-degree angle to prevent water from pooling on the wound. This simple technique helps your rubber tree heal faster and look more natural.
Post-Pruning Recovery Boost: After pruning, place your rubber tree in bright, indirect light for the first week to help it recover. I've found that using a humidity tray with pebbles and water underneath the pot creates the ideal environment for healing. You'll notice new growth emerging from the cut nodes within 2-3 weeks if you provide these optimal conditions. Just remember to reduce watering slightly until you see new leaves forming.
Pro Tips for Cutting A Rubber Tree Plant
- Here's what I learned after pruning my rubber tree for years—these tricks keep your plant thriving and looking its best.
- The Right Time to Prune: Spring is the ideal time to prune your rubber tree because it's when new growth begins.
- Tool Precision Matters: Using clean, sharp pruning shears makes all the difference.
Frequently asked questions
Got questions about cutting your rubber tree plant? You’re not alone! Here are some of the most common concerns—and straightforward answers—to help you prune with confidence.
When is the best time to cut a rubber tree plant?
The ideal time to prune a rubber tree is in early spring or late winter, just before new growth begins. Avoid heavy pruning in fall or winter, as this can stress the plant. Light trimming to shape can be done year-round, but major cuts should wait for active growth periods.
How do I know which branches to cut?
Focus on removing dead, diseased, or crossing branches first. Next, trim back any overly long or leggy growth to encourage bushier growth. Cut just above a leaf node (bud) at a 45-degree angle to promote faster healing. Avoid cutting more than 25-30% of the foliage at once.
Can I use regular scissors or do I need special pruning tools?
For small rubber trees, clean bypass pruners or sharp scissors work fine. For thicker branches (over ½ inch), use pruning shears or a pruning saw. Always sterilize tools with rubbing alcohol to prevent spreading disease. Avoid dull tools—they tear branches instead of making clean cuts.
What should I do if my rubber tree bleeds latex after cutting?
Latex bleeding is normal! It’s the tree’s way of sealing the wound. Let the sap dry completely before touching the cut. If excessive bleeding occurs, apply a pruning sealant (like tree wound dressing) to protect the area. Avoid sealing healthy cuts, as they heal faster with open air exposure.
Are there alternatives to cutting if my rubber tree is overgrown?
If pruning feels too drastic, try topping (cutting the main stem to encourage bushier growth) or pinching back new shoots. For severely overgrown trees, gradual pruning over 2-3 years is gentler. You can also propagate cuttings—rubber trees root easily in water or soil!
Wrapping up and next steps
Cutting a rubber tree plant is a rewarding way to promote healthier growth and stronger branches—and now, you’ve got all the know-how to do it right! 🌱 From gathering the right tools to mastering the timing and technique, every step ensures your tree thrives.
With patience and care, you’ll soon see lush foliage and robust stems that’ll make your green thumb shine.
Ready to take the next step? Start small: Try pruning just one branch this season, observe how it responds, and build your confidence. Before you know it, you’ll be a rubber tree pruning pro! 🌟