Companion Plants
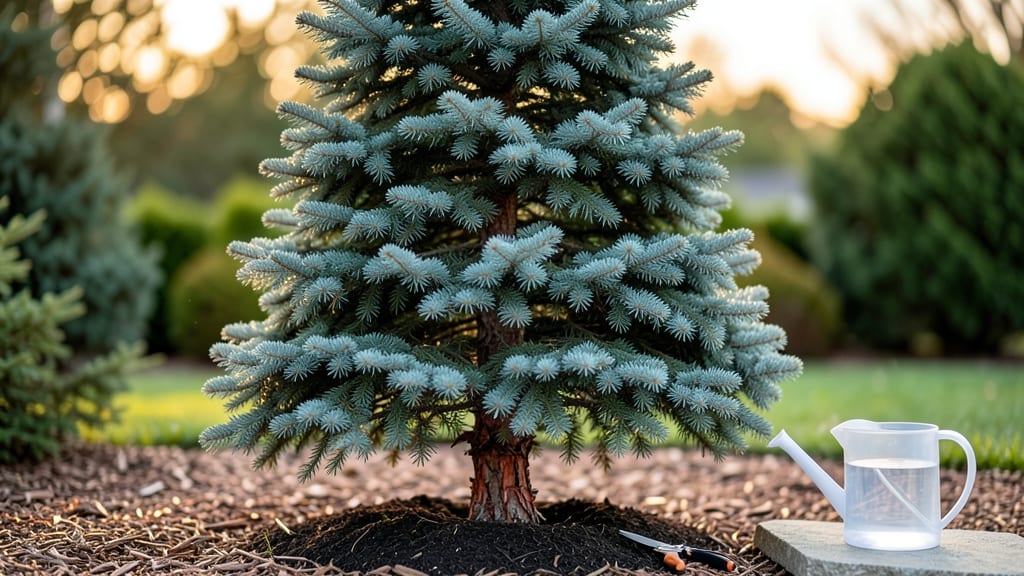
Planting cedar trees in the Pacific Northwest gives your landscape a frost-resistant backbone that thrives where many evergreens fail. 🌲 I’ve watched my Western Red Cedar grow from a sapling to a towering anchor—its rich, aromatic foliage softening harsh winters while providing year-round structure.
The key isn’t just the species (though Western Red Cedar is the local MVP), but matching soil, sunlight, and water to what these trees naturally crave.
You’ll need well-draining soil, 6+ feet of space between plants, and a spot with partial shade—cedars hate baking in full sun. The right species matters too: Eastern Red Cedar tolerates drier climates, while Atlas Cedar adds Mediterranean flair with its silvery-blue needles.
Start with bare-root saplings in early spring or fall for the best root establishment, and mulch heavily to lock in moisture.
Within 3-5 years, you’ll see that signature cedar silhouette emerge—sculptural branches that create privacy screens or focal points. Maintenance is minimal: water deeply once established, prune only to shape, and watch for cedar bark beetles (spray with neem oil if you spot them).
The scent alone—earthy, resinous—makes every season feel like home.
Perfect for hedges, windbreaks, or standalone specimens. Whether you’re replacing a failed evergreen or adding texture to a shady corner, cedars deliver low-maintenance elegance that pays dividends for decades. Let’s get those roots in the ground!
📚 In This Guide
- What you need
- Instructions
- Tips and common mistakes
- Wrapping up and next steps
What you need
- ● Cedar tree plants: 1–3 Thuja plicata (Western Red Cedar) saplings (3–5 ft tall) or bare-root stock (1–2 ft).
- ● OR 50–100 seeds per planting area (if starting from seed—germination takes 2–4 weeks).
- ● Soil amendments: 5–10 lbs of peat moss or compost (to improve drainage and fertility).
- ● 1 lb of slow-release fertilizer (10-10-10 or organic option like fish emulsion).
- ● Planting tools: 1 shovel (for digging holes).
- ● 1 hand trowel (for delicate root adjustments).
- ● 1 pruning shears (to trim dead branches or roots).
- ● 1 measuring tape (to ensure proper spacing).
- ● Mulch: 2–3 cubic feet of wood chips or pine straw (to retain moisture and suppress weeds).
- ● Watering supplies: 1 hose with a gentle spray nozzle or watering can (cedars prefer deep, infrequent watering).
- ● 1 soil pH test kit (cedars thrive in acidic to neutral soil (pH 5.0–7.0); adjust with sulfur or lime if needed).
- ● 1 root stimulator (like mycorrhizal fungi) to boost early growth.
- ● 1 tree guard or wire cage (to protect young saplings from deer or pets).
- ● Eco-friendly pest deterrents (neem oil or diatomaceous earth for aphids or spider mites).
- ● A sunny to partially shaded spot with 6+ hours of light daily (tolerates full shade but grows slower).
- ● Well-draining, moist but not soggy soil (cedars hate waterlogged roots!).
- ● Space! Mature cedars can reach 40–60 ft tall—plant saplings 10–15 ft apart for privacy screens or 3–5 ft apart for hedges.
- ● Patience: Cedar trees grow 1–2 ft per year—plan for long-term beauty! 🌿
Step-by-Step guide to planting cedar trees in the Pacific Northwest
Here’s how to establish these hardy evergreens for lasting beauty and resilience.
🌱 Step 1: Select the Right Cedar Variety and Planting Site
The Pacific Northwest’s climate favors Western Red Cedar (Thuja plicata) or Yellow Cedar (Chamaecyparis nootkatensis), both of which thrive in USDA Zones 5-7. Choose a site with partial shade to full sun—cedars tolerate shade better than full sun, especially in hotter inland areas. Avoid low-lying spots where cold air settles, as cedars dislike prolonged frost pockets.
Test soil drainage by digging a 12-inch hole—if water pools after 30 minutes, amend the area with 3-4 inches of compost or plant on a slight mound. Cedar roots spread widely but aren’t invasive, making them ideal for hedges, windbreaks, or focal points. Measure 10-15 feet apart for mature spacing, as these trees grow 40-60 feet tall over decades.
🪴 Step 2: Prepare the Planting Hole and Handle the Root Ball
Dig a hole twice as wide as the root ball but no deeper—cedar roots prefer surface-level soil. Gently loosen the root ball’s burlap or container if present, trimming any circling roots with clean pruners. This prevents girdling as the tree matures. Place the tree in the hole so the top of the root ball sits 1-2 inches above ground level—cedars hate having their crown buried.
Backfill with the native soil (no amendments needed unless your soil is clay-heavy), tamping lightly every 4-6 inches to eliminate air pockets. Water deeply to settle the soil, then create a 4-inch-high berm around the hole’s edge to direct water toward the roots. Mulch with 3 inches of wood chips, keeping it 6 inches away from the trunk to prevent rot.
☀️ Step 3: Water and Protect During Establishment
Water twice weekly for the first month, then taper to once weekly unless rainfall exceeds 1 inch. Cedar roots are shallow but drought-tolerant once established—overwatering suffocates them. You’ll know moisture is right when the soil feels damp 2 inches down but not soggy. Avoid wetting the foliage to prevent fungal diseases like cedar rust or root rot, common in NW climates.
Stake only if the tree leans—use two flexible stakes tied loosely with 1-inch-wide fabric strips to avoid girdling the trunk. Remove stakes after 12 months to encourage natural wind resistance. In the first winter, wrap the trunk with tree guard if deer or rabbits are present—cedars are browsed heavily in the PNW.
✂️ Step 4: Prune for Shape and Health Annually
Prune in late winter or early spring before new growth begins. Remove dead, crossing, or inward-growing branches with clean, sharp pruners, cutting just outside the branch collar. Avoid heavy pruning—cedars respond poorly to aggressive cuts, and their flat, layered branches create natural wind resistance. Shape only as needed to maintain your desired form.
Watch for bagworms or spider mites, which thrive on cedars in dry summers. Spray with neem oil if you spot webbing or yellowing needles—chemical pesticides harm the tree’s beneficial microbes. Fertilize only if growth stalls after 3 years, using a balanced 10-10-10 fertilizer in early spring. Cedar trees are slow to respond to nutrients, so patience is key.
⏰ Step 5: Monitor for Long-Term Health and Adaptations
After 5 years, cedars require minimal care beyond annual mulch top-ups and seasonal watering during droughts. Their scaly, aromatic foliage deters pests naturally, and their deep taproots make them resilient to urban pollution. If planted near sidewalks, monitor for root lift—cedars can crack pavement over time, so install flexible root barriers if needed.
In the Pacific Northwest, cedars live for centuries, becoming living monuments. Their frost resistance and low maintenance make them the perfect anchor plant for gardens, parks, or even urban streetscapes. With proper spacing and initial care, your cedars will thrive for generations—far outlasting most garden trends.
Tips & tricks for perfect cedar tree planting in the Pacific Northwest
A few key strategies will help you establish cedars that thrive for generations in our region's unique climate.
Soil Test First: The 30-minute drainage test in Step 1 is crucial—cedars hate soggy roots. If your soil drains poorly, consider planting on a mound or amending with 50% compost and 50% sand for better aeration. I've seen cedars fail in heavy clay because roots suffocate, so don't skip this test even if your site seems dry.
Root Ball Prep Matters: When handling the root ball in Step 2, score the sides with a knife if it's been container-grown—this encourages roots to spread outward rather than circling. For burlap-wrapped trees, remove the burlap completely if it's more than 2 inches thick, as it can girdle the trunk over time. The 1-2 inches above ground level placement is non-negotiable—cedars rot when crowns are buried.
Watering Wisdom: The twice-weekly schedule in Step 3 works for most PNW climates, but adjust for your microclimate. In coastal areas, you might need watering only once every 10 days after the first month, while inland spots may require daily watering during summer. Always check soil moisture 2 inches down—it should feel like a damp sponge, not a wet rag.
Long-Term Planning: The 10-15 feet spacing in Step 1 seems generous, but trust me—cedars grow wider than they get tall over time. If you're planting a hedge, space them 6-8 feet apart and prune annually to maintain density. For single specimen trees, give them room to develop their iconic layered branches without competition.
Pro Tips for Cedar Tree Plants
- A few key strategies will help you establish cedars that thrive for generations in our region's unique climate.
- Soil Test First: The 30-minute drainage test in Step 1 is crucial—cedars hate soggy roots. If your soil drains poorly...
- Root Ball Prep Matters: When handling the root ball in Step 2, score the sides with a knife if it's been container-gr...
Frequently asked questions
Got questions about growing cedar trees in your Pacific Northwest garden?
Here are some of the most common ones—plus straight-to-the-point answers to help you plant with confidence!
When is the best time to plant cedar trees in the PNW?
Plant cedar trees in early spring (March–April) or early fall (September–October) for optimal root establishment. Avoid summer heat or winter frost, which can stress young plants. If planting in fall, do it at least 4–6 weeks before the first hard freeze for best results.
How far apart should I space cedar trees for healthy growth?
Spacing depends on the variety, but most Western Red Cedar trees need 10–15 feet between plants. For smaller varieties like Alberta Spruce (often confused with cedar), reduce spacing to 6–10 feet. Check the mature height/width of your specific type—cedars can spread widely!
Why are my cedar tree needles turning brown? Common issues and fixes.
Brown needles usually signal drought stress, pests (like bagworms), or fungal diseases. Water deeply but infrequently (cedars hate soggy roots). Inspect for web-like nests (bagworms) or black tar spots (sooty mold). Prune affected branches and treat with neem oil or insecticidal soap if needed.
Can I grow cedar trees in containers? What’s the best setup?
Yes! Use a large container (at least 20 gallons) with fast-draining soil (mix potting soil with perlite). Choose a dwarf variety like ‘Glauca’ or ‘Ellwoodii’ (mature height: 10–15 ft). Place in partial shade and water when the top 2 inches of soil dry out. Move indoors if temps drop below 10°F.
What are good companion plants for cedar trees in the PNW?
Cedars thrive with shade-tolerant, moisture-loving plants like:
- Rhododendrons or azaleas (acidic soil lovers)
- Ferns (e.g., sword ferns or maidenhair)
- Hosta or heuchera (for ground cover)
- Salal or vine maple (native understory plants)
Wrapping up and next steps
Planting cedar tree plants in the Pacific Northwest isn’t just about adding beauty—it’s about investing in a resilient, evergreen staple that thrives in your climate. These trees offer shade, wildlife support, and long-term elegance with minimal fuss.
Whether you’re a beginner or a seasoned gardener, their frost-resistant nature makes them a perfect choice for your landscape.
Ready to get growing? Start by selecting the right variety for your space, then roll up your sleeves—your future shade anchor is waiting! 🌲✨