
Container Gardens
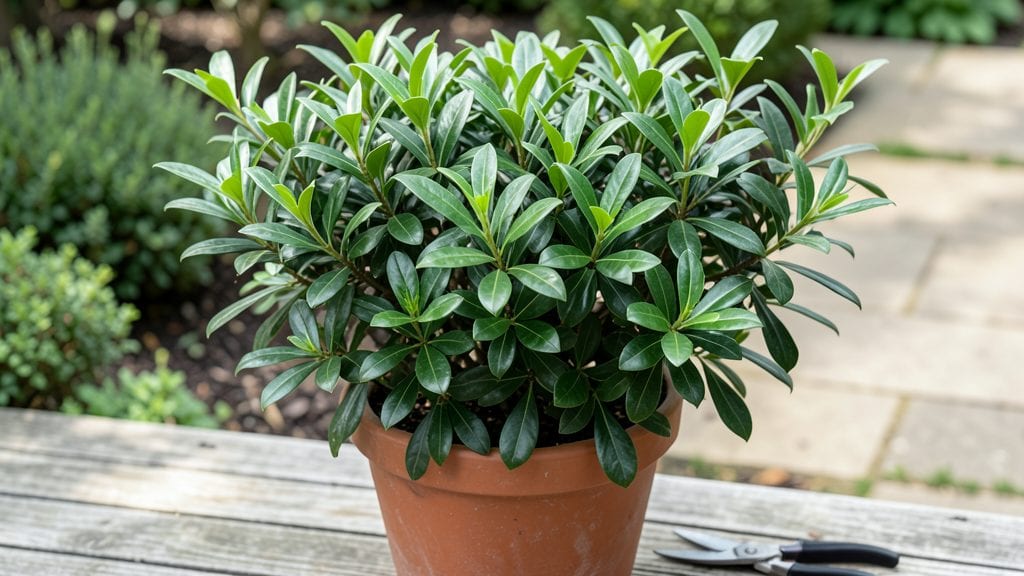
This bay leaf tree potted on my sunny patio has given me fragrant, kitchen-ready leaves for five years—no greenhouse or frost required. 🌿 The secret isn’t complicated: it’s about the right container, soil, and a little winter TLC.
The first time I clipped fresh bay leaves for my holiday cooking, I realized how game-changing this potted herb could be.
You'll need a container at least 18 inches wide and deep—bay trees have deep roots—with drainage holes to prevent soggy soil. A mix of potting soil and perlite keeps roots happy, and a sunny spot (6+ hours of light daily) ensures lush growth.
In colder zones, bring it indoors before temperatures dip below 20°F, since these Mediterranean natives aren't frost-tolerant.
Water when the top inch of soil feels dry, but don't drown it—bay trees hate soggy roots. Feed with balanced fertilizer every 6-8 weeks in growing season, and prune lightly after harvest to encourage bushier growth.
The result? A fragrant, productive tree that smells like a Tuscan kitchen and never stops giving.
Even beginners can master this—my first attempt survived despite my overwatering. The key is patience; bay trees grow slowly but reward you with years of harvests. Ready to grow your own fragrant corner of the Mediterranean?
📚 In This Guide
- What you need
- Instructions
- Tips and common mistakes
- Wrapping up and next steps
What you need
- ● Bay leaf tree (Laurus nobilis) – A healthy nursery-grown sapling (3–5 gallons container size recommended for mature plants).
- ● Container – A durable, well-draining pot (12–18 inches deep, with drainage holes). Materials: terracotta, ceramic, or plastic (terracotta preferred for breathability).
- ● High-quality potting mix – A well-draining blend (60% organic matter, 40% perlite/sand/pumice). Avoid garden soil—it compacts!
- ● Slow-release fertilizer – Balanced 10-10-10 or organic options (follow package rates for potted plants).
- ● Mulch – Organic mulch (pine bark, straw, or coconut coir) to retain moisture and regulate temperature.
- ○ Gloves – Garden gloves (optional but handy for handling soil and pruning).
- ● Pruning shears – Sharp, clean shears (sterilize with rubbing alcohol to prevent disease).
- ● Watering can – With a narrow spout for precise watering (avoid overhead spraying).
- ○ pH testing kit – Optional but useful to check soil pH (6.0–7.0 ideal for bay trees).
- ● Support stake – Bamboo or metal stake (for taller varieties, 4–6 feet).
- ● A sunny spot – 6+ hours of direct sunlight daily (south-facing window or balcony works for indoor pots).
- ● Drainage system – Ensure your container sits on feet or a tray to prevent root rot.
- ● Patience! – Bay trees grow slowly (1–2 feet per year) but reward you with years of lush foliage.
Step-by-step instructions for growing a potted bay leaf tree
Here's how to cultivate a fragrant, low-maintenance bay leaf tree that thrives in containers.
🌱 Step 1: Select and Prepare the Right Container
Choose a 12-15 inch diameter pot with drainage holes—bay trees need room for roots and water to escape. Terra cotta pots work best because they breathe and help regulate moisture. If using plastic, add a layer of pebbles at the bottom to prevent root rot from trapped water.
Fill the pot with well-draining potting mix (avoid garden soil—it compacts and suffocates roots). I mix 50% potting soil, 30% perlite, and 20% coarse sand for perfect drainage. Moisten the mix until it feels like a damp sponge—you shouldn’t see water pooling at the bottom.
🌿 Step 2: Plant Your Bay Tree Seedling
Dig a hole in the center of the pot twice as wide as the root ball but no deeper. Gently remove the seedling from its nursery pot and loosen any circling roots with your fingers. Place it in the hole so the top of the root ball sits 1 inch below the pot’s rim—this prevents water from spilling over during watering.
Backfill with the prepared mix, pressing lightly around the roots to eliminate air pockets. Water immediately until it drains from the bottom holes. Avoid overwatering now—bay trees hate soggy soil. Let excess water drain completely before placing the pot in its final spot.
☀️ Step 3: Provide Bright, Indirect Light
Bay trees need 6-8 hours of bright, indirect light daily—think east or west-facing windows, or a south window with sheer curtains. Direct afternoon sun scorches the leaves, turning them crispy at the edges. If your space is dim, supplement with a grow light kept 6-12 inches away for 12-14 hours daily.
Rotate the pot a quarter turn weekly so the tree grows evenly. You’ll notice leaves leaning toward the light? That’s your cue to move it closer or adjust the grow light position. Yellowing leaves mean too much sun; brown patches mean too little.
💧 Step 4: Water and Fertilize for Healthy Growth
Water when the top 1-2 inches of soil feel dry—stick your finger in to check. Bay trees prefer moderate moisture but won’t tolerate soggy roots. Water deeply until it runs out the drainage holes, then empty the saucer to prevent root rot. In winter, reduce watering to every 2-3 weeks as growth slows.
Feed with a balanced liquid fertilizer (10-10-10) every 4-6 weeks during spring and summer. Cut back to once every 8 weeks in fall and winter. Over-fertilizing burns roots—always dilute fertilizer to half-strength. You’ll see new growth within 2-3 weeks if the plant is happy.
✂️ Step 5: Prune and Maintain Year-Round
Prune in early spring to shape the tree and encourage bushier growth. Use clean, sharp pruners to trim back leggy branches by one-third of their length. Remove any dead, yellow, or crossing branches—this improves airflow and prevents disease. Wipe pruners with rubbing alcohol between cuts to avoid spreading pathogens.
Dust leaves monthly with a damp cloth to keep them fragrant and help the tree breathe. Bay trees are drought-tolerant once established, but they reward consistent care with glossy, aromatic leaves. If your tree drops leaves suddenly, it’s usually a sign of overwatering or sudden temperature drops—adjust care and monitor closely.
Tips & tricks for perfect potted bay leaf tree care
Here's what I've learned after growing my own fragrant bay leaf trees—these simple tricks make all the difference.
Pot Selection Matters: Terra cotta pots are ideal because they breathe and help regulate moisture, but if you must use plastic, add a 2-inch layer of pebbles at the bottom. This creates a buffer zone that prevents water from pooling against the roots, which is crucial since bay trees hate soggy soil. I've seen root rot develop within weeks when this step was skipped—don't make my mistake!
Soil Mix is Non-Negotiable: The 50-30-20 mix of potting soil, perlite, and coarse sand creates perfect drainage that mimics their Mediterranean habitat. If you're short on time, you can substitute the sand with orchid bark—it works just as well for aeration. The key is avoiding garden soil at all costs; it compacts and suffocates those delicate roots.
Light Rotation Strategy: That quarter-turn weekly rotation in Step 3 isn't just about looks—it prevents your tree from growing lopsided toward the light source. I've seen trees develop permanent lean if neglected. Place a small sticky note on the pot's side facing the light source as a reminder to rotate it consistently.
Watering Technique: When checking the top 1-2 inches of soil, use your finger to gauge moisture—not your eyeballs. The soil should feel like a damp sponge, not wet or dry. I've ruined two bay trees by either overwatering or underwatering; this simple finger test has saved countless others. Also, always empty that saucer after watering—bay trees despise sitting in water.
Pro Tips for Bay Leaf Tree Potted
- Here's what I've learned after growing my own fragrant bay leaf trees—these simple tricks make all the difference.
- Pot Selection Matters: Terra cotta pots are ideal because they breathe and help regulate moisture, but if you must use plastic, add a 2-inch layer of pebbles at the bottom.
- Soil Mix is Non-Negotiable: The 50-30-20 mix of potting soil, perlite, and coarse sand creates perfect drainage that mimics their Mediterranean habitat.
Frequently asked questions
Got questions about keeping your bay leaf tree thriving in pots? You’re not alone! Here are answers to the most common concerns—from pruning to pests—so you can enjoy that fragrant, evergreen beauty year-round.
How often should I water my potted bay leaf tree?
Water your bay leaf tree when the top 1–2 inches of soil feel dry. Since it’s potted, it dries out faster than in-ground plants—usually every 5–7 days in summer and every 2–3 weeks in winter. Overwatering is the biggest risk, so check moisture with your finger before watering. Pro tip: Use a pot with drainage holes to prevent root rot!
When and how should I prune my bay leaf tree?
Prune your bay leaf tree in late winter or early spring to shape it and encourage bushier growth. Use clean, sharp pruners to trim back 1/3 of the new growth or shape as desired. Avoid heavy pruning in fall—it stresses the plant before winter. Bonus: Save pruned branches in water for fresh bay leaves!
What pests commonly attack potted bay leaf trees?
Watch for spider mites, aphids, or scale insects, which love the tree’s sap. If you spot sticky residue (honeydew) or tiny webs, wipe leaves with neem oil or insecticidal soap. For severe infestations, isolate the plant and treat every 5–7 days until pests disappear. Prevention? Keep it healthy with proper watering and airflow!
Can I keep my bay leaf tree indoors year-round?
Yes! Bay leaf trees thrive indoors near bright, indirect light (like a south- or west-facing window). If leaves yellow or drop, it’s likely too cold or drafty—keep temps between 60–75°F. Rotate the pot occasionally for even growth. Fun fact: They’re non-toxic to pets, but avoid overfertilizing—it can burn roots!
What’s the best soil mix for a potted bay leaf tree?
Use a well-draining potting mix blended with perlite or sand (50/50 ratio) to mimic its Mediterranean roots. Avoid heavy garden soil—it causes root rot. Repot every 2–3 years in spring, choosing a pot just 1–2 inches larger than the last. Pro move: Add a handful of compost for nutrients!
Why are my bay leaf tree’s leaves turning yellow?
Yellow leaves usually mean overwatering, underwatering, or nutrient deficiency. Check soil moisture first—if it’s soggy, let it dry out. If leaves are crispy, it’s too dry. For yellowing between veins, it’s likely iron deficiency—feed with a balanced liquid fertilizer (half-strength) every 4–6 weeks in growing season.
Wrapping up and next steps
Growing a bay leaf tree in a potted container is a rewarding way to enjoy its fragrant leaves and culinary benefits year-round—even in small spaces! Whether you’re a seasoned gardener or just starting, this aromatic plant thrives with minimal effort, offering both beauty and practicality.
Now that you’re equipped with the right knowledge, why not take the next step? 🌿
- Plant your bay leaf tree today—choose a sunny spot, grab your pot, and let its lush foliage brighten your home or patio.
- Experiment with varieties like Sweet Bay or Texas Bay to discover your favorite scent and flavor.
- Share your progress—tag us in your potted herb garden pics for a chance to inspire others!
Happy gardening—your kitchen (and nose) will thank you! 🌱✨