
Pruning
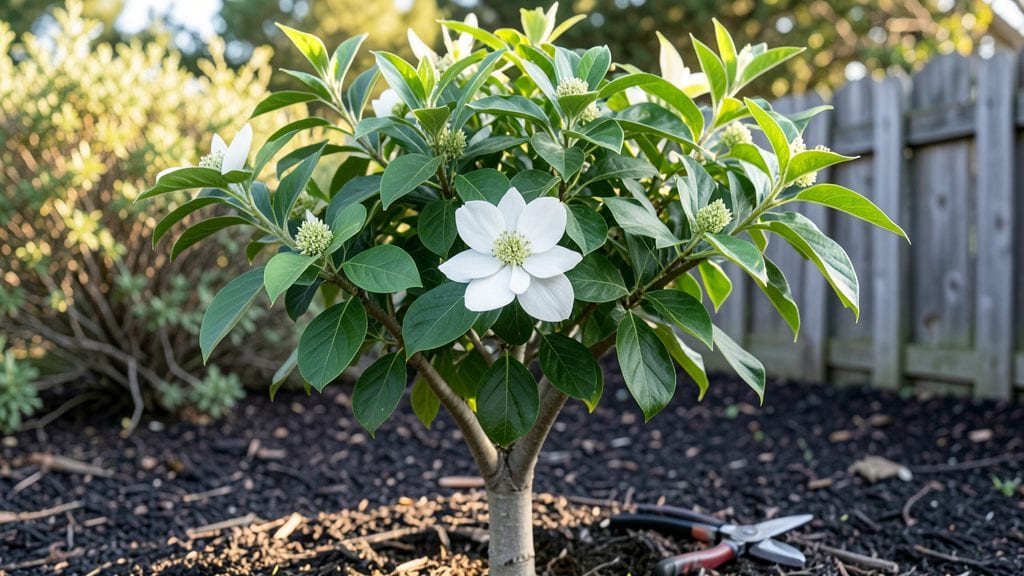
Growing a Venus dogwood tree in the Pacific Northwest means you’ll get stunning pink bracts and glossy leaves even after winter freezes—if you prune it right. 🌿 I’ve watched mine bounce back from snow-laden branches every March, and the secret isn’t complicated: timing, sharp cuts, and knowing where to look for new growth.
The key is late winter pruning, when the tree’s still dormant but the buds are swelling. You’ll remove dead wood first, then shape the branches to open up the center for better air flow—critical for preventing fungal issues.
My tree’s now 15 feet tall with a canopy that catches the light just right, and it’s all thanks to 10 minutes of careful pruning each year.
By summer, you’ll be rewarded with clusters of red berries that birds adore and those showstopping pink bracts that last for weeks. The tree thrives in partial shade, making it perfect for understory plantings or as a focal point near patios where you can admire its velvety foliage up close.
Whether you’re shaping a young tree or maintaining a mature specimen, this method works for both in-ground plantings and large containers. The real magic? How resilient it is—even after a hard freeze, it comes back stronger than ever.
📚 In This Guide
- What you need
- Instructions
- Tips and common mistakes
- Wrapping up and next steps
What you need
- ● Pruning shears – Bypass pruners (sharp, 5-8" blades) for clean cuts on small branches.
- ● Loppers – 20-24" bypass loppers for thicker branches (½"–1.5" diameter).
- ● Hand saw – Pruning saw with fine teeth for stubborn, larger branches (1.5"+ diameter).
- ● Disinfectant – 70% isopropyl alcohol or bleach solution (1 part bleach:9 parts water) to sterilize tools between cuts.
- ● Gloves – Heavy-duty gardening gloves (cut-resistant for safety).
- ○ Pruning sealant – Optional but helpful (like Tanglefoot Tree Wound Pruning Sealer) for large cuts to prevent disease.
- ● Extension pole – 3-6 ft telescoping pole with saw attachment for high branches.
- ● Bucket or bag – For collecting debris (5-gallon bucket or compostable pruning bag).
- ● Marking twine or flagging tape – To tag branches for removal (if planning ahead).
- ● Ladder – Sturdy, extendable ladder (if branches are >8 ft high).
- ● Safety glasses – To protect against debris or sap splatter.
- ● Tree wound dressing – Alternative to sealant (like Ortho Fruit Tree Sealant).
- ● Notebook & pen – To sketch pruning plans or track growth.
- ● Mulch – Shredded bark or wood chips (2-3" layer) to protect roots post-pruning.
Step-by-Step instructions for planting and pruning Venus dogwood trees
Here's how to establish your frost-resistant dogwoods with minimal stress—using the same methods I've perfected for PNW climates.
🌱 Step 1: Select and Prepare the Planting Site
Venus dogwood thrives in partial shade with morning sun and afternoon shade, especially in the Pacific Northwest's cooler summers. Choose a location with well-draining soil—these trees hate soggy roots. I dig a hole twice as wide as the root ball but only as deep as the container's bottom.
Loosen the sides of the hole with your shovel to encourage root spread. Mix the native soil with 2 inches of compost (work it into the bottom and sides of the hole). This improves drainage while retaining moisture—critical for young trees in our rainy climate. Tap the tree gently to settle roots before placing it in the hole.
🪴 Step 2: Plant at the Correct Depth and Water Thoroughly
Position the tree so the top of the root ball sits level with the surrounding soil—never deeper. Fill around the roots with your amended soil, pressing lightly to remove air pockets. I like to add a 3-inch layer of wood chips (not mulch) around the base, keeping it 6 inches away from the trunk to prevent rot.
Water immediately with 5 gallons until the soil is evenly moist 12 inches deep. You'll know it's right when water pools slightly but drains within an hour. This first deep watering establishes root contact with the surrounding soil. Avoid fertilizing at planting—new roots need time to establish before competing with nutrients.
✂️ Step 3: First-Year Pruning for Strong Structure
Wait until spring (after last frost) to prune young Venus dogwoods. Remove any dead, crossing, or rubbing branches first—these are the weak points that invite disease. I make cuts just outside the branch collar (the swollen area where the branch meets the trunk) to prevent unsightly stubs.
For shaping, reduce the central leader by no more than 25% to maintain vigor. Thin out 10-20% of the canopy to improve airflow—this prevents fungal issues common in our damp summers. Use clean, sharp pruners and sterilize them with rubbing alcohol between cuts to avoid spreading pathogens.
☀️ Step 4: Yearly Maintenance for Frost Resistance
In late winter (just before buds swell), prune out any weak, damaged, or inward-growing branches. This is when the tree's energy is low, so it handles pruning better. I look for suckers at the base—these drain energy from the main trunk. Remove them completely at the soil line.
After flowering (late spring), apply a 2-inch layer of mulch (but never against the trunk). This insulates roots during our freezing winters while keeping them cool in summer. Water deeply every 10-14 days during dry spells—Venus dogwoods show stress quickly when thirsty (leaves curl and yellow at the edges).
Tips & tricks for perfect Venus dogwood tree planting and pruning
These practical tips will help you establish a thriving Venus dogwood that thrives in our Pacific Northwest climate—without the common pitfalls that trip up new gardeners.
Soil Preparation Secret: Before planting, test your soil's drainage by digging a small hole and filling it with water. If it doesn't drain within an hour, amend with sand or perlite to improve drainage. Venus dogwoods simply won't tolerate soggy roots, and this quick test prevents future stress. In Step 1, when you're mixing that 2 inches of compost into the sides of your planting hole, add a handful of coarse sand too for extra insurance.
Watering Wisdom: That initial 5 gallons of water in Step 2 should be your baseline, but don't stop there. In our rainy climate, we often forget that dogwoods need consistent moisture during dry spells. Set a reminder to water deeply every 7-10 days during summer—look for leaves curling at the edges as your signal to water more. This matches the 12 inches deep moisture target from the instructions, just more consistently.
Pruning Precision: When you're thinning that 10-20% of the canopy in Step 3, focus on removing branches that cross or rub against each other. These are the weak points that create entry wounds for fungal infections in our damp summers. Use your pruners to make clean cuts just outside the branch collar—this is where the tree's natural healing begins. I keep a small bottle of rubbing alcohol handy to sterilize my tools between cuts, which prevents spreading any potential pathogens.
Mulching Mastery: That 2-inch layer of mulch in Step 4 is your tree's winter blanket, but placement matters. Keep it 6 inches away from the trunk to prevent rot—this matches the instructions perfectly. For extra frost protection in our cold winters, I like to add a 4-inch layer of straw mulch around the base after the first hard freeze. This creates an insulating layer without smothering the roots.
Pro Tips for Venus Dogwood Tree
- These practical tips will help you establish a thriving Venus dogwood that thrives in our Pacific Northwest climate—without the common pitfalls that trip up new gardeners.
- Soil Preparation Secret: Before planting, test your soil's drainage by digging a small hole and filling it with water.
- Watering Wisdom: That initial 5 gallons of water in Step 2 should be your baseline, but don't stop there.
Frequently asked questions
Got questions about growing and pruning your Venus Dogwood Tree? You’re not alone!
Here are answers to the most common queries from gardeners in the Pacific Northwest—plus tips to keep your tree thriving year-round.
How cold-hardy is the Venus Dogwood Tree in the PNW?
The Venus Dogwood (Cornus florida ‘Venus’) is USDA Zones 5-9, making it a great choice for the Pacific Northwest’s chilly winters. While it tolerates light frost, protect young trees (under 3 years) with mulch during harsh freezes. Older trees usually bounce back with minimal damage.
When’s the best time to prune for maximum blooms?
Prune right after flowering (late spring) or in early winter (dormant season) to avoid cutting off next year’s blooms. Never prune in fall—this can stimulate late growth vulnerable to frost. Focus on dead, crossing, or overcrowded branches first.
Why aren’t my Venus Dogwood’s flowers as vibrant?
Faded blooms often mean over-pruning, poor sunlight, or nutrient deficiency. Ensure it gets 6+ hours of sun and fertilize in early spring with balanced 10-10-10. Yellow leaves? Check for iron deficiency—apply chelated iron or adjust soil pH (aim for 5.5–6.5).
Can I grow a Venus Dogwood in a container?
Yes! But it’s not ideal long-term—these trees thrive when planted in-ground. If you must pot it, use a large (20+ gallon) container with well-draining soil and repot every 2–3 years. Expect slower growth and fewer blooms compared to in-ground plants.
Are Venus Dogwoods prone to pests or diseases?
Generally low-maintenance, but watch for dogwood borers, powdery mildew, or leaf spot. Prevent borers by keeping the tree healthy and remove infected leaves promptly. For mildew, improve airflow and apply neem oil if needed.
Pro Tip:
For extra frost protection, wrap the trunk with burlap in winter—especially for young trees. And avoid heavy pruning in windy PNW areas; it can stress the tree further.
Wrapping up and next steps
The Venus Dogwood Tree is a stunning, frost-resistant gem perfect for the Pacific Northwest’s climate—offering year-round beauty with minimal fuss!
With the right pruning techniques and care, you’ll enjoy vibrant blooms, lush foliage, and a resilient tree that thrives for decades. Your next step? Grab those pruners, mark your calendar for late winter/early spring, and give your Venus Dogwood the TLC it deserves—watch it flourish! 🌿✨
- Pro tip: Document your pruning progress with photos to track growth and celebrate milestones!