Pruning
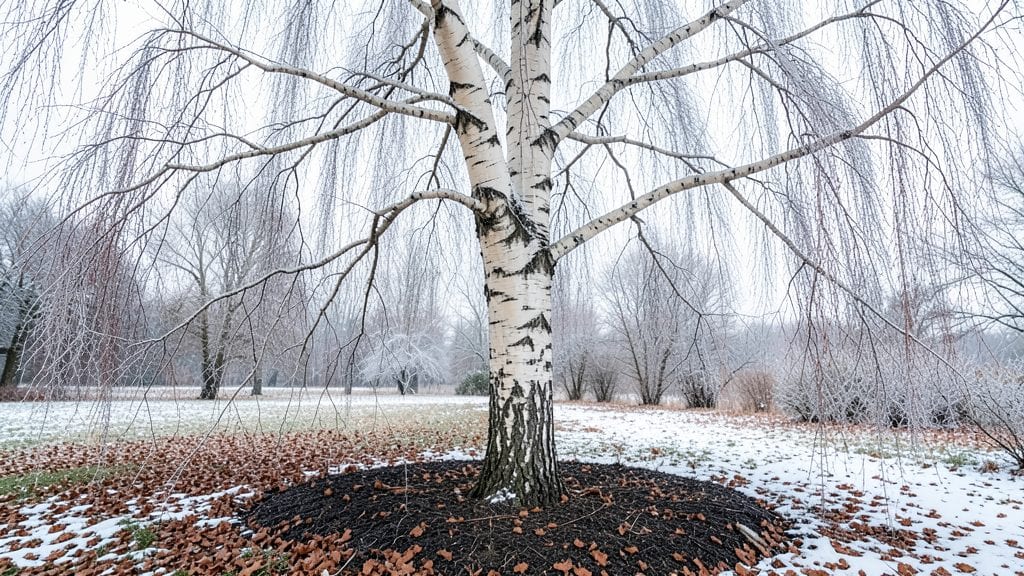
Winter pruning your trees isn’t just about cutting back—it’s about setting the stage for next year’s frost-resistant bloom in the Pacific Northwest’s damp, chilly climate.
I’ve learned the hard way that timing and technique make all the difference between a tree that thrives and one that struggles through the cold months.
The key lies in understanding how trees adapt to winter dormancy, when to prune, and how to protect them from frost damage without smothering their natural resilience.
Deciduous trees like maples and oaks can wait until late winter when they’re still dormant but before new growth starts, usually between January and early March.
Evergreens, though, need a gentler touch—their needles are already stressed from winter winds, so prune them sparingly, if at all, to avoid inviting pests or disease.
Mulching is another game-changer: a 3-inch layer of wood chips or straw keeps roots insulated and retains moisture, while also suppressing weeds that compete for nutrients.
What you’ll end up with is a tree that wakes up stronger in spring, with fewer broken branches and better airflow to prevent fungal issues.
The right cuts encourage new growth in the right places, and proper winter care means your trees will bounce back faster from frost cracks or sun scald. Think of it as giving your trees a cozy winter coat and a haircut that sets them up for success.
This approach works for both urban yards and rural landscapes in the PNW, where wet winters and mild summers create unique challenges.
Whether you’re dealing with a young sapling or a mature oak, the principles stay the same: prune at the right time, protect the roots, and let the tree’s natural rhythms guide you. Ready to give your trees the winter care they deserve?
📚 In This Guide
- What you need
- Instructions
- Tips and common mistakes
- Wrapping up and next steps
What you need
- ● Pruning shears: Bypass pruners (for cuts under ½ inch) – 1 pair (look for Fiskars or Felco for durability).
- ● Loppers: Bypass or anvil (for branches ¾–2 inches thick) – 1 pair (ergonomic handles help with long sessions!).
- ● Pruning saw: Curved-tooth (for branches 2+ inches thick) – 1 saw (avoid rust—opt for stainless steel).
- ● Extension pole: Adjustable (3–10 ft) – 1 pole (for high branches; Fiskars or Amse brands recommended).
- ● Rubbing alcohol (70%+) or bleach solution: (1 part bleach : 10 parts water) – small bottle (to disinfect tools between cuts and prevent disease spread).
- ● Heavy-duty gloves: Cut-resistant (e.g., Mechanix or Wolverine) – 1 pair (PNW thorns and frost can be sneaky!).
- ● Safety glasses: ANSI-rated – 1 pair (splinters and debris are real risks!).
- ○ Ladder (optional): Aluminum or fiberglass (stable, 4+ ft) – 1 ladder (only if branches are >6 ft high; never use a step stool!).
- ● Rope or harness: (if working >10 ft high) – 1 set (PNW winds can make ladders risky!).
- ○ Tree wound dressing (optional): Pruning sealant (e.g., Tanglefoot Tree Wound Pruning Seal) – small tube (controversial but useful for large cuts on Thuja plicata or Tsuga heterophylla).
- ● Shovel or edging tool: (for clearing snow/ice around base) – 1 tool (prevents hidden root damage).
- ● ✅ Weather check: Prune on a dry, calm day (avoid frost or rain within 24 hours of cutting).
- ● ✅ Tree health assessment: Research your tree’s species—some (like Rhododendron) bloom on old wood and shouldn’t be pruned in winter!
- ● ✅ Local regulations: Check if your area requires permits for large trees (e.g., Douglas Fir over 30 ft).
Winter pruning guide for Pacific Northwest trees
Pruning in winter reveals the tree's natural shape while minimizing stress—here's how to do it right.
Assess the Tree and Plan Your Cuts
Start by examining the tree's structure from all sides. Look for dead, diseased, or crossing branches—these are your top priorities. In the Pacific Northwest's cooler climate, winter pruning reduces the risk of fungal infections that thrive in damp, mild conditions. Use a sharp pruning saw or loppers for branches thicker than ½ inch and hand pruners for smaller cuts.
Mark your cuts with a piece of twine or flagging tape if you're unsure. This prevents over-pruning, which weakens the tree. Remember, you're shaping the tree's future growth, not just cleaning up. Aim to remove no more than 25% of the tree's foliage in one season to avoid stressing it.
Remove Dead, Diseased, or Damaged Branches First
Begin with dead or diseased branches—these are easy to spot as they're often brown, brittle, or lack leaves. Cut these back to the collateral branch (a side branch growing from the main stem) or the branch collar (the swollen area where the branch meets the trunk). Avoid leaving stubs, as they can invite decay.
Next, remove any branches that are rubbing against each other or growing inward. These create wounds that can become entry points for pests or disease. If a branch is cracked, split, or broken, remove it entirely. In the Pacific Northwest’s wet winters, damaged wood is especially vulnerable to rot.
Thin Out the Canopy for Better Airflow
Thinning the canopy improves light penetration and airflow, which is crucial for preventing fungal issues in the damp Pacific Northwest climate. Focus on removing branches that are growing too closely together or blocking light from reaching the inner branches. Start from the outside of the tree and work inward to maintain a balanced shape.
When thinning, cut back to a bud or lateral branch that faces the direction you want the tree to grow. Avoid cutting back to a stub—this leaves an open wound that takes longer to heal. If you're unsure about a cut, step back and visualize how the tree will look without it.
Shape the Tree for Balance and Structure
Now, focus on shaping the tree to encourage strong, healthy growth. Remove any suckers (shoots growing from the base or trunk) and water sprouts (fast-growing, vertical shoots). These compete with the main branches for nutrients and weaken the tree. Cut these back to the branch collar or a lateral bud.
For larger branches, use the three-cut method to avoid tearing the bark: Make the first cut about 12-18 inches out from the trunk, then the second cut a few inches further out. Finally, make your final cut just outside the branch collar. This prevents the branch from tearing as it falls.
Clean Up and Protect the Tree
After pruning, sterilize your tools with rubbing alcohol or a 10% bleach solution to prevent spreading disease. Remove all pruned branches and debris from the area around the tree—this reduces hiding spots for pests and limits the spread of disease.
Apply a wound sealant only if the cut is larger than ½ inch in diameter. For smaller cuts, leave them open to heal naturally. In the Pacific Northwest, where winters can be wet, avoid heavy mulching around the base of the tree—keep it 2-3 inches deep and 6 inches away from the trunk to prevent rot.
Tips & tricks for perfect winter tree pruning in the Pacific Northwest
Winter pruning transforms your trees into healthier, more beautiful specimens—but only if you do it right. Here's how to avoid common mistakes and get the best results for your Pacific Northwest climate.
Tool Prep is Everything: Before you start, sharpen your pruning tools to make clean cuts that heal faster. Dull blades tear bark, creating larger wounds that invite disease—especially problematic in the Pacific Northwest's damp winters. I always test my tools on a scrap piece of wood first to ensure they're sharp enough for the job. For larger branches over ½ inch thick, use a pruning saw with a fine-toothed blade to avoid splintering.
Visualize the Final Shape: In Step 3 when thinning the canopy, step back frequently to visualize the tree's shape without branches. This helps you make balanced cuts that improve airflow and light penetration. I like to imagine the tree as a sculpture—each cut should enhance the overall form rather than create random gaps. Focus on removing branches that grow inward or cross others, as these create weak points where pests can enter.
Pacific Northwest-Specific Considerations: The region's wet winters mean fungal diseases are always a risk. After making any cut, especially on branches larger than ½ inch, consider applying a thin layer of wound sealant to prevent moisture from seeping into the wound. For smaller cuts, leave them open to heal naturally—they'll seal faster in dry winter air. Also, avoid pruning during heavy rain or when frost is forecasted, as wet conditions can spread disease through open wounds.
Timing Your Pruning Sessions: If you're working on a large tree, break the job into smaller sessions to avoid stressing the tree. Focus on one section at a time, especially when removing more than 25% of the foliage. I usually tackle one side of the tree per session, allowing the tree to recover between pruning days. This gradual approach is particularly important for mature trees, which can be more sensitive to sudden changes in their structure.
Pro Tips for Tree In The Winter
- Winter pruning transforms your trees into healthier, more beautiful specimens—but only if you do it right.
- Tool Prep is Everything: Before you start, sharpen your pruning tools to make clean cuts that heal faster.
- Visualize the Final Shape: In Step 3 when thinning the canopy, step back frequently to visualize the tree's shape without branches.
Frequently asked questions
Got questions about keeping your trees thriving in the Pacific Northwest’s chilly winters? You’re not alone! Here are some of the most common concerns—and answers—to help you prune with confidence.
When is the best time to prune trees in winter?
The ideal window is late fall through early spring (November–February), before new growth starts. This reduces stress on the tree and minimizes disease risks. In the PNW’s mild winters, aim for dormant season pruning—just avoid heavy pruning during deep freezes. Pro tip: Prune on dry days to prevent fungal infections!
Will pruning in winter harm frost-resistant trees?
Not if done correctly! Frost-resistant species (like Douglas fir, Madrone, or Western Red Cedar) handle winter pruning well, but avoid over-pruning. Focus on removing dead, diseased, or crossing branches—never cut more than 25% of the canopy at once. Healthy trees bounce back faster in spring!
What tools do I need for winter pruning?
Essentials include:
- Bypass pruners (for small branches)
- Loppers (2–4” cuts)
- Pole saw (tall trees)
- Sharp pruning saw (thick branches)
- Disinfectant (rubbing alcohol or bleach solution)
Clean tools between cuts to prevent spreading pests or diseases. Pro tip: Store tools in a dry place to avoid rust in damp PNW winters!
Should I prune before or after a rainstorm?
Wait for dry weather—pruning wet branches can tear bark or spread fungal spores. If rain is forecast, prune a few days ahead. Wet conditions also make tools slippery, increasing injury risks. Bonus: Prune in the morning when branches are stiff (less sap loss).
What if my tree looks sad after winter pruning?
Don’t panic! Trees may appear dormant, but they’re conserving energy. Signs of trouble include:
- Oozing sap (normal for some species)
- Wilting or yellowing after buds break (over-pruning or disease)
- No new growth by late spring (check for root issues)
If concerned, consult a local arborist. Most PNW natives recover beautifully with proper care!
Wrapping up and next steps
Winter may seem like a dormant season for trees, but with the right pruning techniques, you can set the stage for vibrant blooms and resilient growth in the Pacific Northwest’s frost-prone climate.
By timing cuts, sharpening your tools, and respecting your tree’s natural rhythms, you’re not just trimming branches—you’re crafting a blueprint for beauty that thrives year-round. 🌿❄️
Ready to take action? Grab your pruners and start small—even a single well-placed cut can make a difference. Your tree (and future garden) will thank you!
- 📅 Plan your first pruning session before the next frost.
- 📝 Sketch a rough map of branches to trim for clarity.
- 🌱 Celebrate progress—every cut is a step toward a healthier tree!