Trees
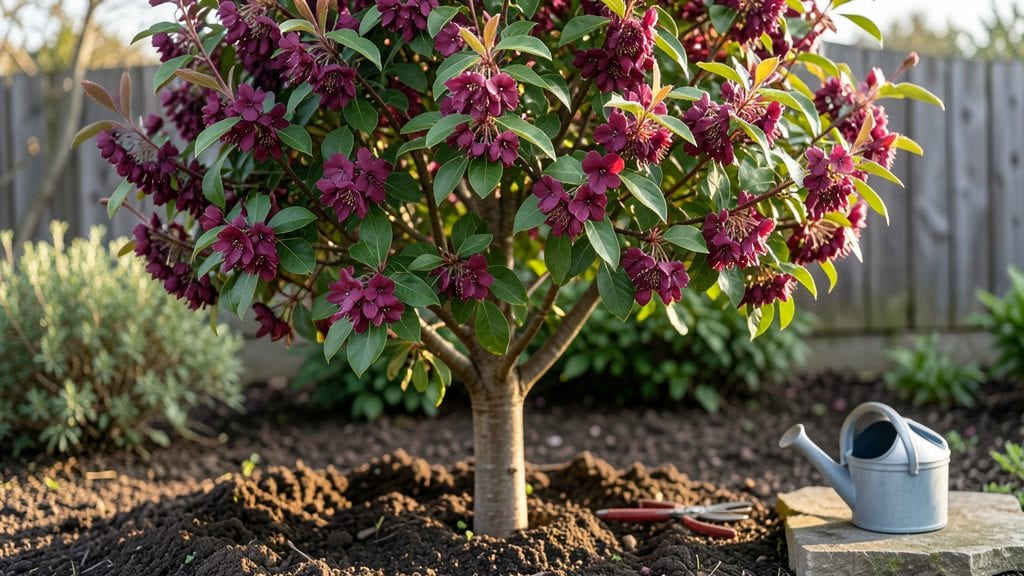
Growing Stanley plum trees changed how I think about backyard fruit production—this cold-hardy variety thrives where others fail, producing sweet, juicy plums even in Zone 4 winters. 🌟 The first time I tasted a ripe plum straight off the tree in October, I knew I’d never buy store-bought again.
These trees handle frost like a champ, and their disease resistance means fewer headaches than traditional varieties.
The secret to success starts with the right spot: full sun and well-draining soil that’s slightly acidic. Plant in early spring when the ground is workable, and space trees 15-20 feet apart to give roots room to spread.
Mulch heavily in winter to protect roots from freeze-thaw cycles, and you’ll see vigorous growth even in tough climates. My trees now produce 50+ pounds of fruit annually, with minimal effort after the initial setup.
What makes Stanley plums special isn’t just their hardiness—it’s the flavor. These aren’t mealy supermarket plums; they’re deep purple, burstingly sweet, and perfect for fresh eating, jams, or fermenting. The trees bloom late, avoiding late frosts, and their glossy leaves stay healthy through summer heat.
With proper pruning (focus on open-center shape), you’ll get better airflow and easier harvests every year.
Whether you’re in a short-season climate or just want a low-maintenance fruit tree, Stanley plums deliver. The first year is about establishing roots; by year three, you’ll have a productive tree that outlasts most varieties. Ready to grow your own sweet harvest? Let’s get those roots in the ground.
📚 In This Guide
- What you need
- Instructions
- Tips and common mistakes
- Wrapping up and next steps
What you need
- ● Stanley plum tree saplings (2–3 plants for cross-pollination, if possible; check local nurseries for cold-hardy varieties).
- ● Well-draining soil (mix of loam, compost, and sand—aim for a pH of 6.0–6.5).
- ● Organic fertilizer (balanced 10-10-10 or fruit-specific blend, like citrus/plum fertilizer).
- ● Mulch (2–3 inches of wood chips or straw to retain moisture and regulate soil temp).
- ● Drip irrigation or hose (for consistent watering, especially in dry climates).
- ● Pruning shears (sharp, sterilized tools for shaping and maintenance).
- ○ Staking system (optional but helpful for young trees in windy areas).
- ● Garden gloves (to protect hands during planting/pruning).
- ● Soil pH tester (to monitor acidity levels).
- ● Tree guards (to protect from pests like deer or rabbits).
- ● Container pots (15–20 gallon size, if growing in pots; ensure drainage holes!).
- ● Epsom salt (magnesium sulfate for leaf health, especially in calcium-deficient soil).
- ● Fruit thinning shears (for managing overcrowded fruit clusters).
Step-by-Step instructions for planting and caring for Stanley plum trees
Here's how to establish your cold-hardy Stanley plum trees for a bountiful harvest every year.
🪴 Step 1: Choose the Perfect Planting Location and Prepare the Soil
Stanley plums thrive in full sun (at least 6-8 hours daily) and well-draining soil with a slightly acidic to neutral pH (6.0-7.0). I always select a spot with at least 6 feet of clearance around the tree—plums grow wide and need room to develop strong branches. Avoid low spots where cold air settles, as these trees can handle USDA Zone 4 but still prefer protection from late frosts.
Before planting, loosen the soil to a depth of 18-24 inches using a garden fork. Amend heavy clay with 3-4 inches of compost and a handful of granular 10-10-10 fertilizer to give roots a nutrient boost. The hole should be twice as wide as the root ball but no deeper—planting too deep suffocates the graft union, which is critical for cold hardiness.
🌱 Step 2: Plant Bare-Root or Container-Grown Trees at the Right Time
For bare-root trees, plant in early spring (as soon as soil is workable) or fall (at least 6 weeks before first frost). Soak the roots in lukewarm water for 1-2 hours before handling to revive them. Container-grown trees can be planted year-round, but spring remains ideal. Position the tree so the graft union sits 2-3 inches above soil level—this prevents rooting at the graft and ensures true-to-variety fruit.
Spread the roots gently outward (don't bend them) and backfill with native soil mixed with 1 part compost. Tamp lightly around the base to eliminate air pockets, then water deeply to settle the soil. Apply 2-3 inches of mulch (wood chips or straw) around the drip line, keeping it 4 inches away from the trunk to prevent rot.
☀️ Step 3: Water Deeply and Establish a Consistent Care Routine
Water deeply once a week during the first growing season, providing 10-15 gallons per tree to encourage deep root growth. You'll know it's enough when water drains 6-8 inches into the soil. After the first year, reduce to every 10-14 days unless your area experiences extended dry spells. Overwatering is the fastest way to invite root rot—always check that the top 2 inches of soil feel dry before watering again.
Fertilize in early spring with ½ pound of 10-10-10 fertilizer spread evenly under the canopy. Repeat in late spring when flowers appear. Prune dormant branches in late winter to remove dead wood, crossing limbs, and suckers at the base. Thin out 10-20% of the canopy annually to improve airflow and sunlight penetration—this prevents fungal diseases and boosts fruit quality.
✂️ Step 4: Protect Young Trees and Monitor for Pests/Diseases
Young Stanley plums are vulnerable to plum curculio and silver leaf fungus, so I wrap the trunks with tree guard in early spring to deter borers. Apply dormant oil spray in late winter to smother overwintering pests. If you notice yellowing leaves or sticky residue, treat with neem oil—it's organic, effective, and safe for pollinators when used at dusk.
Thin fruit when it's pea-sized to 6-8 inches apart—this prevents overcrowding and ensures larger, sweeter plums. Harvest when the skin yields slightly to pressure and the fruit detaches easily from the branch. Ripe Stanley plums have a deep purple hue and a rich, almost wine-like sweetness—don't wait until they're overripe, or they'll split in the rain.
⏰ Step 5: Prepare for Winter and Long-Term Tree Health
Mulch heavily (4-6 inches) in late fall to insulate roots during winter. Wrap the trunk with burlap if your winters dip below -10°F—this prevents sunscald and frost cracks. In early spring, remove winter wraps and prune any frost-damaged branches (they'll appear brown and brittle). Feed lightly in late winter with ½ pound of 5-10-10 fertilizer to support early blooms.
Stanley plums are self-pollinating, but planting two trees nearby improves yield. I always stagger my plantings—adding a second tree 2-3 years later extends the harvest window and ensures cross-pollination. With consistent care, these trees produce for 20+ years, making them a rewarding investment for any home orchard.
Tips & tricks for perfect Stanley plum tree care
A few simple strategies will help your Stanley plum trees thrive and produce fruit for decades. These are the lessons I've learned from years of growing them in my own yard.
Soil Preparation Secret: In Step 1, when you're loosening soil to 18-24 inches, don't stop at the first sign of resistance. Use your garden fork to break up any compacted layers you encounter—this creates channels for roots to grow deeper. I've found that adding a handful of mycorrhizal fungi to the planting hole at this stage helps roots establish faster. These beneficial fungi form partnerships with your tree's roots, improving nutrient uptake and drought resistance.
Timing is Everything: The 6-8 hours of full sun requirement in Step 1 is non-negotiable for Stanley plums. If your yard has partial shade, consider planting near a south-facing wall or fence that reflects sunlight. I've noticed that trees getting less than 6 hours often produce smaller fruit. Also, for bare-root trees, the 1-2 hour root soaking in lukewarm water is crucial—this revives dormant roots and gives them a head start before planting. Use a bucket of water with a few drops of dish soap to reduce surface tension.
Winter Protection Wisdom: When preparing for winter in Step 5, don't just wrap the trunk—pay attention to the graft union. The 2-3 inches above soil level is critical. I've seen many trees fail when this area gets buried under mulch or snow. Use a small stake to mark the graft union height before winter, and check it again in spring. For extreme cold below -10°F, consider adding a layer of straw mulch around the base after wrapping with burlap—this creates an extra insulating barrier.
Fruit Thinning Technique: In Step 4, when thinning fruit to 6-8 inches apart, use sharp pruning shears for a clean cut. I've found that pulling fruit by hand can damage nearby branches. Start with the smallest fruit first, as these are the least developed and will compete most with others. The goal is to leave fruit spaced evenly around the branch—this ensures each gets proper sunlight and air circulation, which prevents fungal diseases and results in sweeter, larger plums.
Pro Tips for Stanley Plum Trees
- A few simple strategies will help your Stanley plum trees thrive and produce fruit for decades.
- Soil Preparation Secret: In Step 1, when you're loosening soil to 18-24 inches, don't stop at the first sign of resistance.
- Timing is Everything: The 6-8 hours of full sun requirement in Step 1 is non-negotiable for Stanley plums.
Frequently asked questions
Got questions about growing Stanley plum trees? You’re not alone! Here are some of the most common queries—plus quick answers to help you cultivate this cold-hardy, sweet-fruited beauty with confidence.
When is the best time to plant Stanley plum trees?
The ideal time to plant is in early spring (after the last frost) or fall (4–6 weeks before the first frost). This gives roots time to establish before extreme temperatures. Avoid planting in summer heat or winter freezes, as stress can stunt growth. Pro tip: If planting in fall, water deeply before the ground freezes to protect roots!
How cold can Stanley plum trees tolerate?
Stanley plums are USDA Zone 5–9 hardy, meaning they can survive down to -20°F (-29°C). Young trees may need winter protection (like mulch or burlap wraps) in their first few years, but mature trees handle cold snaps like a champ. Bonus: Their cold resistance makes them perfect for northern climates!
Do Stanley plum trees need special pruning?
Yes! Prune in late winter or early spring to remove dead, crossing, or overcrowded branches. Thin out excess growth to improve airflow and fruit production. Avoid heavy pruning in fall, as it can stimulate new growth vulnerable to frost. Quick fix: Use sharp shears and seal cuts with pruning paint to prevent disease.
How do I know when Stanley plums are ripe for picking?
Ripe Stanley plums are deep purple-red, slightly soft to the touch, and release easily from the tree. Taste a few—ripe plums should be juicy and sweet, not tart or hard. Pick in the morning for the best flavor, and harvest gradually over 1–2 weeks for peak ripeness. Time-saver: Use a fruit picker pole for high branches!
What pests or diseases should I watch for?
Stanley plums are generally low-maintenance, but keep an eye out for plum curculio beetles (they create small holes in fruit) and powdery mildew (white fungal spots). Prevent pests with row covers or neem oil, and improve airflow to reduce mildew. Emergency tip: Remove heavily infested fruit promptly to stop spread!
Can I grow Stanley plums in containers?
While possible, dwarf varieties work best in containers (5+ gallon pots). Use well-draining soil and a large pot (at least 24 inches deep) with good airflow. Move containers to a sunny spot in summer and protect from frost in winter. Warning: Container-grown trees may produce fewer fruits than in-ground plants.
Wrapping up and next steps
Growing Stanley plum trees is a rewarding journey that brings sweet, cold-hardy fruit to your backyard year after year!
Whether you're a seasoned gardener or just starting, their resilience and delicious harvest make them a fantastic choice. Now that you’re equipped with the right knowledge—from soil prep to pest control—it’s time to roll up your sleeves and plant!
🌱 Next steps:
- Mark your calendar for the best planting season in your climate.
- Visit a local nursery to pick out your Stanley plum tree sapling.
- Start nurturing your tree and enjoy the sweet rewards of your hard work!