Pruning
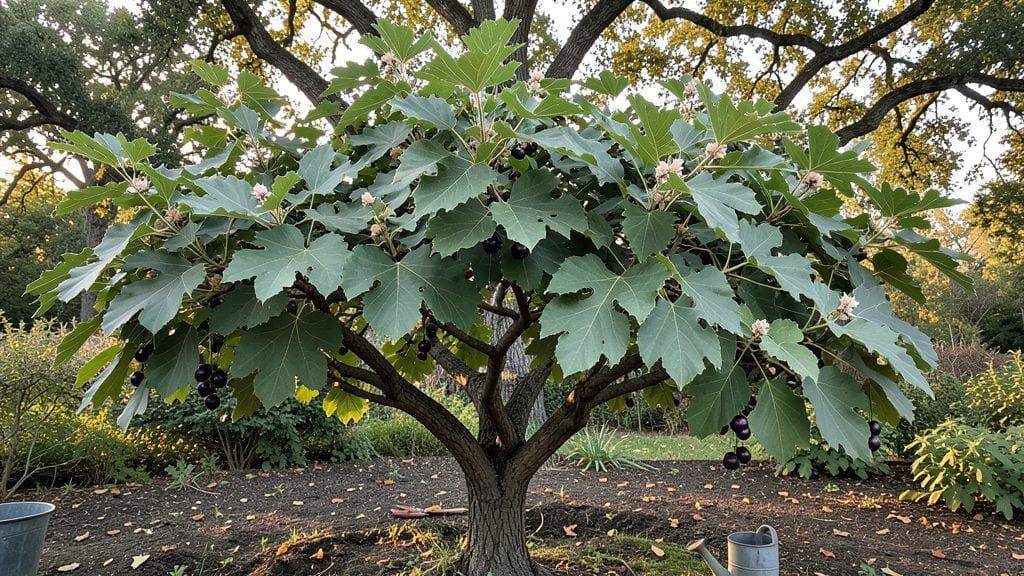
Pruning an old mulberry tree in the Pacific Northwest isn’t just about cutting branches—it’s about reviving a stubborn giant that’s survived decades of frost, wind, and neglect. 🌿 I’ve spent years wrestling with these trees, and the difference between a thriving canopy and a tangled mess comes down to three key cuts made at the right time.
The goal? Keep the tree strong enough to handle our damp winters while encouraging lush summer fruit.
Most gardeners overlook the root flare and hidden branches, but that’s where the real work happens. You’ll need sharp loppers, a sturdy ladder (or a very patient friend), and a clear day—no pruning after rain when branches are slippery.
The best time to prune is late winter, just as buds swell but before new growth starts. That’s when the tree’s energy is low, so it won’t bleed sap or stress over the cuts.
By the time summer rolls around, you’ll see the difference: fewer weak limbs, better air circulation, and fruit that’s easier to harvest. The tree will reward you with denser foliage, fewer disease spots, and berries that actually ripen before the birds eat them all.
Plus, you’ll avoid the heartbreak of a snapped branch during next winter’s ice storms.
This method works for any mature mulberry in zones 6-8, whether it’s a heritage variety or a wildling that took root decades ago. The same principles apply whether you’re dealing with a single tree or a whole grove. Let’s get those branches under control before next frost season hits.
📚 In This Guide
- What you need
- Instructions
- Tips and common mistakes
- Wrapping up and next steps
What you need
- ● Pruning shears: Bypass pruners (for cuts under ½ inch) – 1 pair (look for sharp, rust-resistant stainless steel blades).
- ● Loppers: Long-handled (24–36 inches) for thicker branches (½–2 inches) – 1 pair (choose anvil or bypass type).
- ● Pruning saw: Curved-tooth or bow saw for branches over 2 inches – 1 saw (avoid cheap models; durability matters!).
- ● Safety gear: Heavy-duty gloves (cut-resistant, like mechanic’s gloves or pruning-specific).
- ● Protective eyewear (safety goggles rated for debris).
- ● Long sleeves/pants (to avoid scratches from thorns or sawdust).
- ● Disinfectant: 70% isopropyl alcohol or bleach solution (1 part bleach to 9 parts water) – small spray bottle (to sterilize tools between cuts).
- ○ Sealing wax or pruning paint: Optional but helpful for larger cuts (to prevent disease entry) – small jar (e.g., Tanglefoot Tree Wound Pruning Sealer).
- ● Extension pole: For hard-to-reach branches (attachable to loppers or pruners).
- ● Ladder: Sturdy, non-slip (if tree exceeds 8–10 feet; 3-aluminum or fiberglass for safety).
- ● Heavy-duty trash bags: For collecting debris (2–3 large bags).
- ● Garden twine or zip ties: To secure branches during drying (if needed).
- ● Notebook & pen: To sketch pruning plan or note frost-damaged areas.
- ● ✅ Check the weather: Prune on a dry, calm day (avoid wind or rain).
- ● ✅ Timing: Late winter/early spring (before buds swell) is ideal for PNW frost resilience.
- ● ✅ Tree health: Ensure the tree isn’t stressed by drought or pests (water deeply 1–2 weeks prior).
- ● 💡 Pro tip: Sharpen your tools beforehand—dull blades tear wood, inviting disease. A file or sharpening stone works great!
Instructions for reviving a Pacific Northwest mulberry tree
Here’s how to nurse your frost-hardy mulberry back to health with strategic cuts and seasonal care.
✂️ Step 1: Assess the Tree’s Structure and Health
Start by examining the tree’s branches from all sides. Look for dead wood—it’ll be brittle, gray, or snap easily when tested. I always run my fingers along the bark: smooth, firm branches are alive, while rough or hollow ones are gone. Mark these with a flagging tape or paint for later removal.
Next, check for signs of disease like fungal growth or oozing sap. In the Pacific Northwest’s damp climate, mulberries often battle powdery mildew or canker. If you spot these, note their locations—they’ll need extra attention during pruning. Healthy branches should have a consistent green hue and small buds along their length.
✂️ Step 2: Prune Dead and Diseased Wood First
Use sharp, clean pruning shears to cut out all dead or diseased branches at their base. I like to make cuts just outside the branch collar—the swollen area where the branch meets the trunk. This ensures the tree can seal the wound properly. For larger branches, use a pruning saw and cut at a slight angle to prevent water from pooling.
Don’t worry about the timing here—you can prune dead wood anytime, even in winter. The goal is to remove anything that’s weighing down the tree or spreading disease. If a branch is larger than 4 inches in diameter, consider hiring a professional to avoid damaging the tree’s structure.
☀️ Step 3: Thin the Canopy for Better Airflow and Light
Mulberries thrive with good airflow, so aim to thin the canopy by 20-30% to let sunlight reach the inner branches. Focus on removing branches that cross or rub against each other—they’ll create wounds and invite pests. I start at the top and work my way down, cutting back branches that grow inward or downward.
Watch for water sprouts—those fast-growing, vertical shoots that pop up along the trunk or branches. These sap suckers drain the tree’s energy. Snip them off at the base as soon as you spot them. After thinning, step back and visualize the tree’s shape: you want an open, rounded crown that lets light filter through.
⏰ Step 4: Shape the Tree for Frost Resistance
In the Pacific Northwest, cold snaps can damage mulberries, so prune to encourage a sturdy structure. Remove any branches that grow too close to the ground—they’re more likely to break under snow or ice. For larger branches, make your cuts just outside a lateral bud or branch to promote new growth in the right direction.
If your tree has been neglected, you might need to do this in stages over 2-3 years. Never remove more than 25% of the canopy in one season—this stresses the tree and can lead to decline. After pruning, rake up and dispose of all debris to prevent fungal spores from lingering.
🌱 Step 5: Post-Pruning Care for Revival
Water the base of the tree deeply after pruning to help it recover. Mulberries have deep roots, so aim for 1-2 inches of water per week, especially during dry spells. Spread a 2-3 inch layer of mulch around the tree (but keep it away from the trunk) to retain moisture and regulate soil temperature.
Keep an eye on the tree over the next few weeks. New growth should appear within 4-6 weeks if the pruning was successful. If you notice yellowing leaves or wilting, it might be a sign of over-pruning or stress. In that case, hold off on further cuts and focus on watering and fertilizing instead.
Tips & tricks for reviving an old mulberry tree
Reviving a Pacific Northwest mulberry tree takes patience and precision—here’s how to avoid common pitfalls and maximize your tree’s recovery.
Tool Selection: Invest in a sharp bypass pruner for clean cuts on branches up to ½ inch thick. For larger branches, a pruning saw with a curved blade prevents pinching and tearing. I’ve made the mistake of using dull tools, which crush the bark and invite disease—always test your tools on a scrap branch first. For branches over 4 inches, consider hiring a professional arborist to ensure proper technique and safety.
Seasonal Timing: Late winter or early spring (just before buds swell) is ideal for pruning mulberries in the Pacific Northwest. This timing encourages vigorous new growth while minimizing stress. If you must prune in summer, do it on an overcast day to reduce water loss through fresh cuts. Avoid pruning in fall, as new growth won’t have time to harden off before winter.
Disease Prevention: Sterilize your tools between cuts by wiping with rubbing alcohol or a 10% bleach solution. This prevents spreading fungal spores like powdery mildew or canker, which are common in our damp climate. I also recommend disposing of pruned debris far from the tree—burning or chipping is best to eliminate potential infection sources. For infected branches, seal the cuts with pruning sealant to prevent further spread.
Visual Cues for Healthy Growth: After pruning, look for these signs of recovery: new buds should appear within 4-6 weeks, and leaves should be a vibrant green. If you see yellowing leaves or wilting, it’s a sign of over-pruning or stress—reduce watering slightly and focus on mulching to retain moisture. Healthy mulberries also develop small, round fruit buds along the branches in late summer, indicating the tree is storing energy properly.
Pro Tips for Old Mulberry Tree
- Reviving a Pacific Northwest mulberry tree takes patience and precision—here’s how to avoid common pitfalls and maximize your tree’s recovery.
- Tool Selection: Invest in a sharp bypass pruner for clean cuts on branches up to ½ inch thick.
- Seasonal Timing: Late winter or early spring (just before buds swell) is ideal for pruning mulberries in the Pacific Northwest.
Frequently asked questions
Got questions about reviving your frost-resistant old mulberry tree in the Pacific Northwest? Here are some common concerns—and straightforward answers—to help you prune with confidence.
When is the best time to prune an old mulberry tree in the PNW?
The ideal window is late winter to early spring (February–March), just before new growth starts. This timing minimizes stress and avoids frost damage. If you must prune in summer, do it after fruit harvest to avoid attracting pests. Avoid pruning in fall—it can stimulate late growth vulnerable to cold snaps.
How do I protect my mulberry tree from PNW frosts?
Frost-resistant mulberry trees still benefit from care! Prune damaged branches in early spring, and apply a 3–4 inch layer of mulch around the base (but not touching the trunk) to insulate roots. Wrap young or newly pruned trees in burlap or frost cloth during hard freezes. Water deeply before winter to help roots withstand cold.
Can I prune too much at once? What’s the rule?
Yes! Follow the “thirds rule”: Never remove more than one-third of the tree’s foliage in a single session. Old mulberry trees are resilient, but aggressive pruning can stress them, especially in the PNW’s damp climate. Spread heavy pruning over 2–3 years if needed, focusing on dead, diseased, or crossing branches first.
Will pruning affect my mulberry tree’s fruit production?
Pruning can boost fruit quality! Removing overcrowded or weak branches improves airflow, reducing fungal issues and increasing sunlight exposure—both key for sweeter berries. However, avoid heavy pruning in fruit-bearing years; prioritize structure first. Thin out excess fruit clusters (if needed) to prevent branch breakage from heavy loads.
What if my mulberry tree has no leaves after pruning?
Don’t panic! Mulberry trees are late bloomers—leaves may appear 4–6 weeks after pruning. If the tree remains bare by mid-spring, check for root rot, borers, or winter dieback. Water deeply, fertilize lightly with balanced 10-10-10, and monitor for pests. If >50% of branches are dead, consult a local arborist.
Are there alternatives to traditional pruning for old trees?
Yes! For large, mature trees, consider crown thinning (removing select branches to open the canopy) or pollarding (cutting back to a stub to encourage new growth). In the PNW, avoid topping—it’s harsh and invites disease. For minimalists, focus on removing water sprouts and suckers to redirect energy to fruit production.
Wrapping up and next steps
Reviving your old mulberry tree in the Pacific Northwest isn’t just about pruning—it’s about honoring its resilience and giving it a fighting chance against frost and time. 🌿 With the right tools, timing, and techniques, you can transform a struggling tree into a thriving, frost-resistant beauty that stands for decades to come.
The key? Patience, precision, and a little love—just like nurturing any cherished part of your landscape.
Ready to roll up your sleeves? Start small—pick one section of the tree to prune this season, then build confidence as you go. Before you know it, your mulberry tree will be stronger, healthier, and ready to reward you with sweet, juicy berries (or stunning foliage, if you prefer!).
Happy pruning!