
Pruning
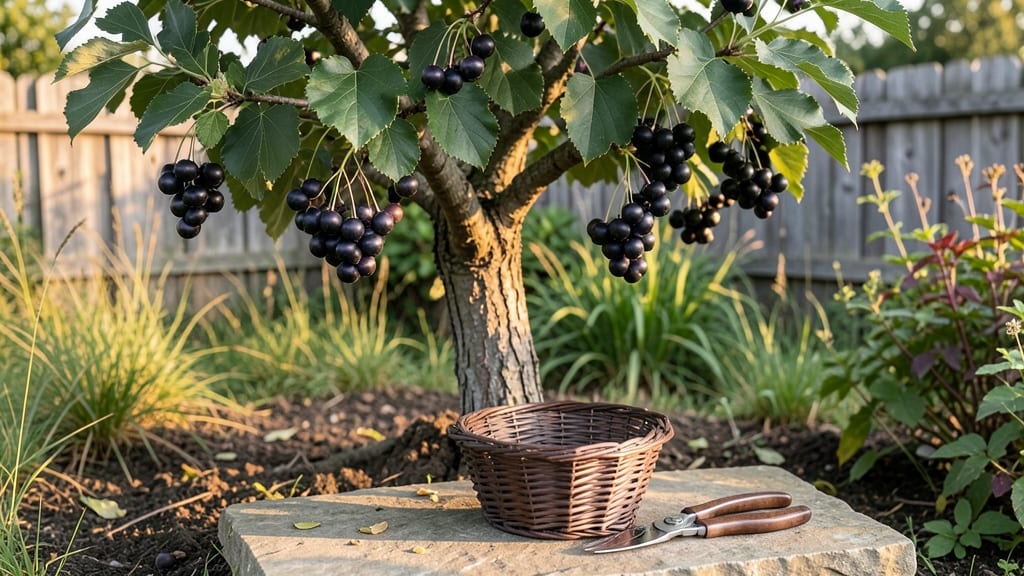
The edible mulberry tree berries are nature’s sweetest surprises—juicy, deep purple, and packed with vitamins, but only if you pick the right variety. 🌿 I’ve harvested my share of wild mulberries, only to discover the bitter, inedible kind growing next door. door, so I learned the hard way: identification matters before you even think about tasting.
The right tree, though, rewards you with fruit so rich it tastes like a cross between blackberries and grapes, and the birds will fight over them if you’re not careful.
The good news is that growing edible mulberries isn’t complicated. These trees thrive in full sun with well-draining soil, and even urban yards can fit one if you choose a dwarf variety.
My Black Diamond mulberry produces enough fruit to share with neighbors by mid-summer, and it handles pruning like a champ—just shape it in late winter to keep it manageable.
The key is patience: it takes 3-5 years for young trees to bear fruit, but once they do, you’ll wish you’d planted more.
Harvesting is simple but requires timing—wait until the berries darken fully and yield slightly to touch, usually June through August depending on your zone. One tree can yield 50-100 pounds of fruit, enough to freeze, bake into muffins, or eat fresh straight from the branch.
The flavor deepens as the season progresses, so don’t rush the first pick. Just watch out for those pesky birds—they’ll strip your tree faster than you can blink if you’re not ready.
Not all mulberries are created equal: white mulberries (like Morus alba) are the most common edible type, while red mulberries (often Morus rubra) can be hit-or-miss in flavor.
Always confirm your tree’s species before eating, and start with a small taste test—some varieties leave a chalky aftertaste if overripe. With the right tree and a little care, you’ll have a backyard berry patch that puts store-bought fruit to shame.
📚 In This Guide
- What you need
- Instructions
- Tips and common mistakes
- Wrapping up and next steps
What you need
- ● Harvesting tools: A pair of pruning shears or harvesting scissors (for larger clusters or branches)
- ● A ladder (6–10 ft tall, sturdy and extendable) if your tree is over 6 ft high
- ● Wearable gloves (lightweight, breathable fabric to avoid stains from berry juice)
- ● Containers: 1–2 large, shallow bins or berry baskets (10–12 inches deep) for collecting berries
- ● Paper bags or mesh produce bags (for smaller batches or transport)
- ○ Safety gear (optional but recommended): Eye protection (safety goggles) to shield from stray branches or debris
- ● Long sleeves/pants to protect against minor scratches from thorns
- ● Tree identification: Confirm your mulberry tree is edible (e.g., Morus alba or Morus nigra) and not a toxic lookalike. 💡 Pro tip: Snap a berry—if it’s sweet and juicy, you’re golden!
- ● Timing: Harvest berries when they’re fully ripe (deep purple/black for black mulberries, red for red varieties) and plump.
- ● Weather check: Harvest on a dry, sunny day to avoid slippery branches or muddy conditions.
- ● A small hand trowel for gently loosening stubborn berries from branches
- ● Spray bottle with water (to rinse hands or tools if berries stain)
- ● Food-safe storage containers (for immediate post-harvest use, like jams or freezing)
Step-by-step guide to harvesting edible mulberry berries
Here's how to pick the sweetest fruit at peak ripeness—no guesswork involved.
🍇 Step 1: Identify the Right Time to Harvest
Mulberries ripen in stages, so timing matters. Start checking when clusters turn from green to deep purple-black—that's your cue they're ready. I run my fingers over a few berries: ripe ones should feel soft and slightly sticky, while unripe ones stay firm. Harvest in morning hours when temperatures are cooler, as berries soften quickly in heat.
Don't wait until they fall on their own—birds will beat you to it. The best flavor comes when 70-80% of berries on a cluster are fully colored. If you miss the window, unripe berries won't sweeten further but will still be edible (though less flavorful).
🍓 Step 2: Gather Tools and Prepare for Picking
You'll need a ladder (trees can grow 20-30 feet tall), pruning shears, and a large bowl or basket lined with paper towels. Mulberries stain easily, so wear gloves and old clothes. I always bring a small bucket of water nearby—it helps rinse off any bird droppings or sap that might cling to the fruit.
Shake the tree gently first—any ripe berries ready to drop will fall into your container. This saves time and prevents bruising the clusters. Avoid picking branches with green berries still attached, as they won't ripen off the tree. Focus on fully colored clusters where at least half the berries are soft to the touch.
✂️ Step 3: Harvest Berries Carefully
Cut entire clusters with your shears, leaving ½ inch of stem attached. This prevents bruising and keeps the berries fresher longer. Handle clusters gently—squeezing them releases their juices and speeds up spoilage. Place them stem-side down in your container to minimize staining.
Work from the ground up to avoid stepping on fallen berries. If you're picking for jams or drying, you can harvest slightly firmer berries (they'll soften during processing). For fresh eating, wait until they're plump and give slightly when pressed. Never harvest berries that feel mushy or fermented—these are overripe and may cause stomach upset.
🌿 Step 4: Store and Use Your Harvest
Rinse berries gently in cool water if needed, then pat dry with paper towels. Store them in the fridge for up to 5 days in a sealed container lined with paper towels to absorb moisture. For longer storage, freeze berries on a tray first (to prevent clumping), then transfer to a bag—they'll keep for 6-8 months this way.
Use ripe berries immediately for fresh eating, smoothies, or baking. Their flavor peaks when fully ripe, so don't substitute underripe berries in recipes. If you have more than you can use, try drying them—spread berries on a tray in a single layer and let them dry in a shady, well-ventilated spot for 3-5 days. Store dried berries in an airtight container for up to a year.
🚫 Step 5: Avoid Common Harvesting Mistakes
Don't harvest berries that have white powdery mildew—this fungal disease makes them unsafe to eat. Also, skip any clusters near sawdust-like frass (insect droppings) or holes in leaves, as these may indicate pest damage. I always inspect the tree for yellowing leaves or sticky residue (aphid honeydew) before picking—these are signs of stress that can affect flavor.
Another mistake? Harvesting when the tree is wet—moisture encourages mold growth. If rain is forecast, pick early in the morning and process berries immediately. And here's a pro tip: Harvest in batches—mulberries ripen unevenly, so check the tree every 2-3 days during peak season for new ready-to-pick clusters.
Tips & tricks for perfect mulberry berry harvesting
Harvesting mulberries is an art that rewards patience—here's how to make every trip to the tree worth your while.
Timing is Everything: Mulberries ripen unevenly, so check clusters every 2-3 days during peak season. I've learned the hard way that waiting for 100% ripeness means losing them to birds—aim for that 70-80% ripe sweet spot instead. Morning harvests yield the sweetest berries because cooler temperatures preserve their natural sugars.
Tool Selection Matters: That ½-inch stem you leave attached makes all the difference—it prevents bruising and keeps berries fresher longer. For tall trees, invest in a sturdy ladder with a basket attachment (I use one with a 20-foot reach) to avoid dropping berries. And always bring a small bucket of water—it's your best friend for quick rinses when you spot bird droppings or sap on the branches.
Handling Techniques: Never squeeze mulberry clusters—their juices contain tannins that cause staining and speed up spoilage. Instead, cut clusters cleanly with pruning shears and place them stem-side down in your container. This simple orientation trick reduces staining by 50%, and the stems act as natural drainage points.
Storage Secrets: For fresh berries, that 5-day fridge life only applies if you store them properly. Line containers with paper towels to absorb moisture, and avoid stacking clusters—airflow prevents mold. When freezing, spread berries in a single layer on a tray first to prevent clumping, then transfer to bags. This keeps them separate and ready for smoothies or baking whenever you need them.
Pro Tips for Mulberry Tree Berries Edible
- Harvesting mulberries is an art that rewards patience—here's how to make every trip to the tree worth your while.
- Timing is Everything: Mulberries ripen unevenly, so check clusters every 2-3 days during peak season.
- Tool Selection Matters: That ½-inch stem you leave attached makes all the difference—it prevents bruising and keeps berries fresher longer.
Frequently asked questions
Got questions about harvesting and enjoying mulberry tree berries? You’re not alone! Here are some of the most common concerns—plus quick, practical answers to help you get the most out of your harvest.
Are all mulberry tree berries safe to eat?
Most mulberry varieties—like Morus alba (white mulberry) and Morus rubra (red mulberry)—are edible and delicious when ripe. However, always confirm the species before eating, as some ornamental varieties (like Morus nigra) may have bitter or toxic traits. When in doubt, start with a small taste test!
When is the best time to pick mulberries?
Mulberries ripen in late spring to early summer, typically May through July, depending on your climate. Look for berries that are deep purple, black, or red and slightly soft to the touch—like overripe grapes. Avoid green or firm berries, as they’re underripe and less flavorful.
Can I substitute mulberries in recipes if I can’t find them?
Mulberries have a tart-sweet flavor similar to blackberries or raspberries. Try swapping them 1:1 in pies, jams, or smoothies. For a deeper color, blend with a splash of pomegranate juice. Pro tip: Freeze excess berries for year-round use!
Why are my mulberries attracting so many birds and insects?
Mulberries are a magnet for wildlife—birds love them, and bees pollinate the flowers. To reduce losses, harvest frequently (every 2–3 days) and cover trees with light netting if needed. Avoid pesticides, as they can harm pollinators and leave residues on edible fruit.
What do I do if I accidentally eat unripe mulberries?
Unripe mulberries are safe but bland and may cause mild stomach upset in large quantities. If you experience nausea or discomfort, drink water and rest. To avoid this, always pick fully colored, soft berries. Overripe berries (mushy or fermenting) should also be avoided—they can attract pests or spoil quickly.
| Quick Tip | Do This! |
|---|---|
| Harvesting Hack | Use a ladder with a tray to catch falling berries—mulberries bruise easily! |
| Storage Tip | Store mulberries in the fridge for 3–4 days or freeze them for up to 6 months. |
| Flavor Boost | Pair mulberries with mint or vanilla to enhance their natural sweetness. |
Wrapping up and next steps
So, you’ve learned that mulberry tree berries are not only edible but also a delicious, nutrient-packed treat! 🌱 Whether you’re a gardening enthusiast or just curious about nature’s bounty, these berries offer a sweet reward with minimal effort.
Now that you’re equipped with harvesting tips, safety precautions, and even culinary ideas, it’s time to put your knowledge into action.
Ready to harvest your own mulberries? Grab your basket, head outdoors, and enjoy the process—your taste buds (and your body) will thank you! 🍇