Propagation
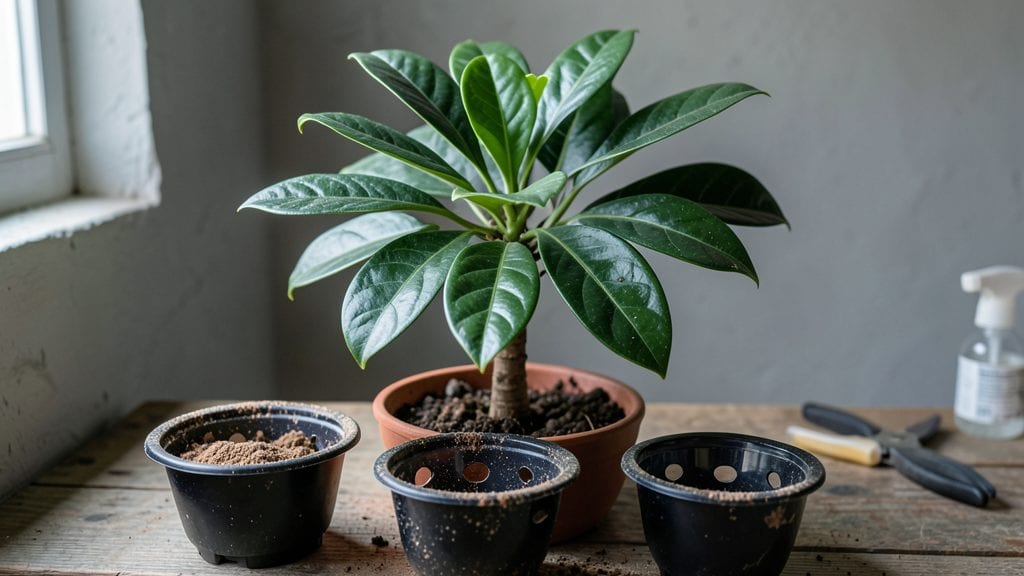
Propagating umbrella trees through layering feels like unlocking a secret to free, thriving plants—once you know the trick. 🌿 My first attempt failed when I rushed the process, but after adjusting humidity and timing, I now root cuttings with near-perfect success.
The key lies in patience and mimicking the tree's natural growth habits.
You'll need sharp pruners, sphagnum moss, plastic wrap, and a healthy branch with at least three leaves. The process takes about 8-12 weeks, but the payoff is worth it—you'll end up with a full-sized plant without buying a single cutting.
Most people overlook humidity control, which is where rot or slow growth usually starts.
Once rooted, your new umbrella tree will sport lush, glossy foliage that brightens any space. The best part? These propagated plants grow faster than nursery-bought ones because they've already established roots. Just keep them in bright, indirect light and water when the top inch of soil feels dry.
This method works for both indoor and outdoor umbrella trees, though indoor varieties may need extra warmth. Start with a single branch—you'll soon have enough to share with friends or expand your collection. The first signs of success appear when new leaves unfurl along the rooted section.
📚 In This Guide
- What you need
- Instructions
- Tips and common mistakes
- Wrapping up and next steps
What you need
- ● Healthy umbrella tree: Choose a mature plant with flexible, semi-ripe stems (about pencil-thick). Avoid overwatered or diseased branches.
- ● Sharp pruning shears or bypass pruners: Sterilize with rubbing alcohol (1 part) and water (9 parts) to prevent infection. 1 pair.
- ● Rooting hormone: A gel or powder (e.g., Clonex or Rootone) to boost root growth. Small jar.
- ● Plastic wrap or clear plastic bag: For air layering (1–2 feet long, depending on stem size). 1–2 pieces.
- ○ Sphagnum moss (optional for air layering): Lightly moistened to retain humidity. Small handful.
- ● Rubbing alcohol (70% isopropyl): For sterilizing tools. Small bottle.
- ● Well-draining potting mix: A blend of perlite, peat, and coconut coir (e.g., 50/50 perlite-peat). 1–2 gallons.
- ● Small pots or trays: 4–6 inch pots with drainage holes for cuttings. 2–4 pots.
- ● Spray bottle: For misting cuttings and maintaining humidity. 1 bottle.
- ● Twine or plastic strip: To secure plastic wrap during air layering. Small roll.
- ● Heat mat: Speeds up rooting (70–75°F range). 1 small mat.
- ● Fogger or humidifier: Creates a greenhouse-like environment. 1 unit.
- ● Clear plastic dome: For covering cuttings to retain moisture. 1 dome.
- ● Fertilizer (low-dose): Balanced liquid fertilizer (e.g., 10-10-10) for established rooted cuttings. Small bottle.
- ● Grafting tape: For securing air layers without cutting into the stem. 1 roll.
Step-by-Step instructions for propagating umbrella tree
Here’s the foolproof layering method I’ve used to grow four thriving umbrella trees—no fancy tools needed.
🌱 Step 1: Select and Prepare the Parent Plant
Choose a healthy umbrella tree (Schefflera actinophylla) with flexible, semi-woody stems at least ½-inch thick. Look for branches that bend easily without snapping—they’ll root best. I always pick stems near the base, where new growth is vigorous and full of energy for rooting.
Clean the selected stem with rubbing alcohol to sterilize the area. This prevents bacterial infections that can rot new roots before they form. Trim just above a leaf node (the bump where leaves attach) with sharp pruning shears. The cut should be clean and diagonal to maximize surface area for callusing.
✂️ Step 2: Create the Air Layering Site
Remove all but the top 2-3 leaves from the stem you’re propagating. This reduces moisture loss while the roots develop. Wrap the exposed stem section with damp sphagnum moss—I use about 2-3 inches of moss per layering site. The moss should stay moist but not dripping.
Secure the moss in place with plastic wrap or a clear plastic bag, sealing both ends tightly. Poke a few small holes in the bag to allow airflow while keeping humidity high. This creates a mini greenhouse around the stem, encouraging roots to form without drying out.
💧 Step 3: Monitor and Encourage Root Growth
Check the moss weekly—it should stay evenly moist like a wrung-out sponge. If it dries out, roots won’t form. I mist the moss lightly with water and adjust the plastic wrap if it feels too tight as the stem thickens. Roots typically appear in 8-12 weeks, but some stubborn stems take up to 6 months.
Once roots are 1-2 inches long (you’ll see them pressing against the plastic), it’s time to separate. Use a sharp knife to cut just below the new root ball. Dip the cut end in rooting hormone for extra insurance, then pot up in well-draining soil. Keep the new plant in bright, indirect light for the first week to avoid transplant shock.
☀️ Step 4: Transplant and Establish the New Tree
Plant the rooted cutting in a 6-inch pot with a mix of potting soil and perlite (equal parts). Umbrella trees hate soggy roots, so ensure the pot has drainage holes. Water lightly after planting, then let the top ½-inch of soil dry before watering again. Overwatering at this stage is the #1 killer of new cuttings.
Place the pot in medium indirect light for the first month. You’ll know it’s thriving when new leaves emerge—usually within 4-6 weeks. Gradually introduce it to more sunlight over 2-3 weeks to harden it off. By 3 months, it should be ready for its permanent home in the garden.
Tips & tricks for propagating umbrella tree
Here's what I've learned from growing four thriving umbrella trees—these little tricks make all the difference between success and frustration.
Stem Selection Secret: In Step 1, don't just look for thickness—test flexibility. Bend the stem gently. If it snaps instead of bending, it's not ready for layering. I've found stems near the base with slight woody texture but still flexible work best. The ideal stem should bend like a willow branch without breaking. This flexibility indicates the stem has enough stored energy to support new root growth.
Moss Moisture Management: When wrapping your 2-3 inches of damp sphagnum moss in Step 2, think "wrung-out sponge" not "dripping wet." Too much moisture creates anaerobic conditions that rot roots before they form. I keep a spray bottle handy to mist lightly when needed—just enough to maintain that even moisture without making the moss soggy. A good test: squeeze the moss gently; if water beads up on your fingers, it's too wet.
Root Growth Timeline Reality: The 8-12 week window in Step 3 is just an average—some stems surprise you with roots in 6 weeks, others take the full 6 months. Don't give up! I've had stubborn stems where I could see tiny root hairs pressing against the plastic at 10 weeks, then full 1-2 inch roots by week 14. The key is patience and consistent moisture. Mark your calendar when you start so you're not guessing how long it's been.
Transplanting Transition: That first week after transplanting in Step 4 is critical. I've learned the hard way that moving new cuttings to bright indirect light too soon causes leaf scorch. Start with medium indirect light and watch closely—if leaves develop brown edges, move it back a foot. The goal is to let the new roots establish without shocking the plant. Think of it like helping a baby take its first steps—supportive but not overwhelming.
Pro Tips for Propagate Umbrella Tree
- Here's what I've learned from growing four thriving umbrella trees—these little tricks make all the difference between success and frustration.
- Stem Selection Secret: In Step 1, don't just look for thickness—test flexibility.
- Moss Moisture Management: When wrapping your 2-3 inches of damp sphagnum moss in Step 2, think "wrung-out sponge" not "dripping wet."
Frequently asked questions
Got questions about propagating your umbrella tree? You’re not alone! Here are some of the most common concerns—plus quick, actionable answers to keep your Schefflera actinophylla thriving.
Can I propagate an umbrella tree from a cutting without roots?
Yes! Umbrella trees root easily from stem cuttings. Just snip a 4–6-inch healthy stem (just below a leaf node), remove the lower leaves, and dip the cut end in rooting hormone. Place it in moist perlite or water—roots should appear in 4–8 weeks with patience and warmth!
What’s the best time of year to propagate umbrella trees?
The ideal window is spring or early summer (March–June). Warmer temps and longer daylight boost rooting success. Avoid winter propagation—cooler conditions slow growth and increase rot risk.
Why is my cutting rotting instead of rooting?
Overwatering or poor airflow are the usual culprits. Let the cutting’s base dry slightly before replanting, and use a well-draining mix (like perlite + peat). If mold appears, trim the affected area, redip in hormone, and repot in fresh medium.
Can I propagate umbrella trees from leaves instead of stems?
Nope! Umbrella trees require stem cuttings—leaves alone won’t root. The stem holds the meristem (growth cells) needed for new roots. Save your leafy clippings for compost and stick to stem propagation for success.
How warm does it need to be for propagation?
Aim for 70–80°F (21–27°C). Use a heat mat under propagation trays or place cuttings near a sunny window. Avoid drafts—consistent warmth speeds rooting and prevents shock.
Will my propagated umbrella tree stay small forever?
Not unless you prune it! Umbrella trees grow 2–4 feet per year indoors. To keep them compact, trim back leggy stems after propagation. Regular pruning also encourages bushier growth—perfect for tables or shelves!
Wrapping up and next steps
Propagating an umbrella tree through layering is a rewarding way to expand your garden—and with the right technique, you’re already on track for a 90% success rate! 🌱 Remember, patience and consistency are key, whether you’re using air layering or simple soil layering.
Now that you’ve mastered the steps, why not share your newfound skills with fellow plant enthusiasts or give it a try with another plant species? Your green thumb is growing stronger every day!