Pruning
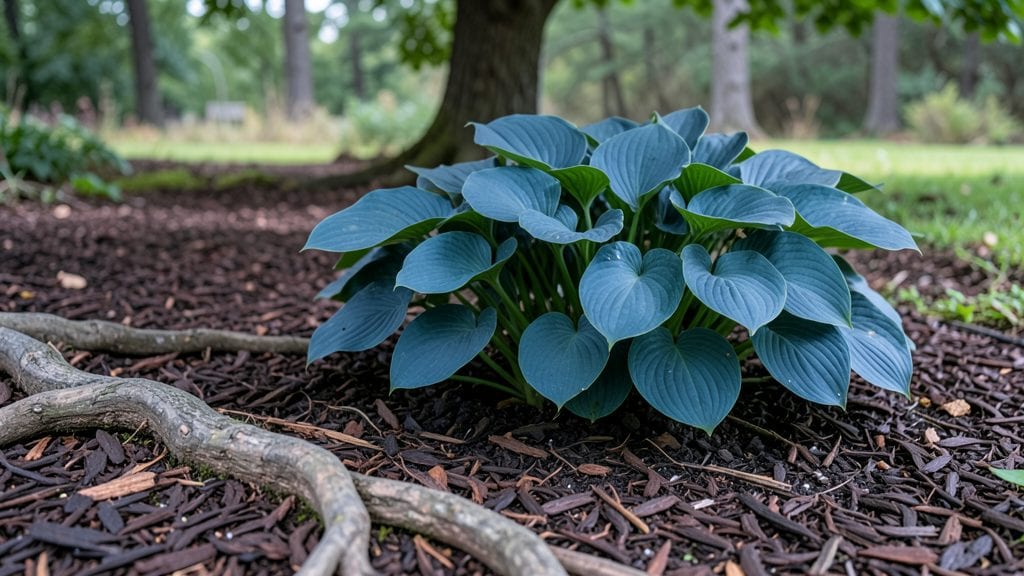
A flower bed under tree transforms what many see as wasted space into a lush, ever-changing tapestry of foliage and blooms. 🌿 I’ve designed these beds for friends who dread the shady corners where grass struggles—turning them into vibrant, low-maintenance focal points instead.
The key lies in layering plants that thrive in dappled light, from bold hostas to delicate ferns and impatiens that burst with color when others fade.
Start with a 3-inch layer of mulch to protect roots and suppress weeds, then choose plants that play well together. Taller varieties like astilbes or heucheras go at the back, medium-heights like coral bells or ajuga in the middle, and creeping thyme or sweet woodruff as ground cover.
Spacing matters—give each plant room to breathe, and avoid planting too close to the tree’s trunk where roots compete fiercely.
What you’ll end up with is a bed that looks intentional, not neglected. In spring, hellebores bloom before leaves emerge; summer brings impatiens and ferns; and fall delivers fiery foliage from Japanese maples or smoke bushes.
The best part? Once established, these beds need minimal care—just occasional watering and an annual top-up of mulch.
This approach works under oaks, maples, or even dense evergreens. The trick is selecting plants that match your tree’s shade level—full shade for dense canopies, partial shade for lighter dappling. Let’s bring that under-tree space to life without the fuss.
📚 In This Guide
- What you need
- Instructions
- Tips and common mistakes
- Wrapping up and next steps
What you need
- ● Shade-tolerant plants: 10–15 plants (mix of perennials, annuals, and ground covers). Examples: Heuchera (1–2 plants, 12–18" tall)
- ● Astilbe (3–5 plants, 1–3' tall)
- ● Ferns (e.g., Dryopteris, 3–4 plants, 1–2' tall)
- ● Impatiens (10–15 plants, 6–12" tall, for color bursts)
- ● Hosta (3–5 plants, 1–3' tall, for texture)
- ● Mulch: 2–3 bags (3–4 cubic feet each) of organic mulch (e.g., shredded bark or pine straw) to retain moisture and suppress weeds.
- ● Soil amendments: 1–2 bags of compost (for enriching soil)
- ● 1 bag of peat moss or coconut coir (to improve drainage)
- ● Hand trowel (for planting small roots)
- ● Garden fork (to loosen compacted soil under the tree)
- ● Pruners or shears (for trimming plants and clearing debris)
- ● Measuring tape or string (to mark out the flower bed layout)
- ● Garden gloves (to protect your hands)
- ● Watering can or hose with a gentle spray nozzle (for post-planting hydration)
- ○ Optional: Edging tool (to define the bed’s borders neatly).
- ● Tree root zone assessment: Ensure the flower bed stays at least 3–5 feet away from the tree trunk to avoid root competition.
- ● Light conditions: Identify whether the area is full shade (0–3 hours of sun), partial shade (3–6 hours), or dappled light (filtering sun). Plant choices depend on this!
- ○ Soil test (optional but helpful): Check pH and nutrient levels—most shade plants prefer acidic to neutral soil (pH 6.0–7.0).
- ● Water source: Plan for consistent watering (especially for new plants). Drip irrigation or soaker hoses work great under trees!
Step-by-Step guide to layering a flower bed under a tree
This is how I create a thriving, low-maintenance shade garden that blooms from spring through fall.
🌱 Step 1: Clear and Prepare the Space
Start by removing any grass, weeds, or debris from the area using a garden fork or shovel. I like to work in sections about 2 feet wide to avoid fatigue. Dig down 6-8 inches to loosen the soil—this helps roots spread easily later.
If your tree has shallow roots (like maples), be extra gentle near the trunk. You'll know you've done enough when the soil crumbles easily between your fingers. Spread a 2-inch layer of compost over the entire area and mix it into the top 4 inches of soil. This improves drainage and gives shade plants the nutrients they need to thrive.
🪴 Step 2: Layer Plants by Height and Function
Begin with the tallest plants at the back (closest to the tree trunk) and work forward to shorter ones. I typically use 3-4 different shade-tolerant perennials like hostas, astilbes, or ferns for the back layer. These should be spaced 12-18 inches apart to allow room for growth.
Add mid-height plants like bleeding hearts or lungworts about 6-12 inches in front of the back layer. These should be spaced 8-12 inches apart. Finally, fill the front with low-growing ground covers like creeping phlox or ajuga, spaced 6-8 inches apart. This creates a natural, cascading look that hides bare soil.
☀️ Step 3: Mulch and Protect New Plantings
Spread a 3-inch layer of mulch over the entire bed, keeping it 2-3 inches away from plant stems to prevent rot. I prefer shredded bark or pine needles because they break down slowly and retain moisture. This layer also suppresses weeds and keeps soil temperatures stable.
Water deeply right after planting to settle the soil and encourage roots to spread. You'll know you've watered enough when moisture reaches 6 inches deep. After that, water 1-2 times per week during dry spells, aiming for 1 inch of water per week. Shade plants need consistent moisture but hate soggy soil.
🌿 Step 4: Maintain and Refresh Seasonally
In early spring, remove any dead foliage from perennials and add a fresh ½-inch layer of compost over the mulch. This gives plants a nutrient boost without disturbing roots. I also check for weeds and pull them before they compete with your flowers for water and nutrients.
Throughout the growing season, monitor for pests like slugs or aphids. If you spot damage, treat it immediately with neem oil or insecticidal soap. In fall, cut back any plants that die back naturally (like ornamental grasses) and add a final layer of mulch to protect roots over winter.
Tips & tricks for perfect shade garden layering
A few simple strategies will help you create a lush, low-maintenance flower bed that thrives under your tree all year.
Soil Preparation Secret: In Step 1, don't just spread compost—mix it thoroughly into the top 4 inches of soil. This creates a nutrient-rich zone where roots can easily access food. I like to use a garden fork to gently aerate the soil while mixing, which also helps break up any compacted areas from tree roots. This step makes all the difference for shade plants that need consistent moisture and nutrients.
Plant Spacing Strategy: When layering plants in Step 2, think about their mature size, not just their current size. For example, hostas can grow 2 feet wide, so place them 18 inches apart to prevent overcrowding. I always check plant tags for mature size information before purchasing—this saves me from having to thin out plants later. The cascading effect you want won't happen if plants get too crowded as they grow.
Mulching Wisdom: The 3-inch mulch layer in Step 3 is your secret weapon against weeds and moisture loss. I prefer shredded bark because it breaks down slowly, but pine needles work beautifully too—they're acidic and perfect for blueberry-loving plants. Keep that mulch 2-3 inches away from stems to prevent rot, and always refresh it in spring to maintain that protective layer. This simple step cuts my weeding time by 70%!
Watering Technique: That initial deep watering in Step 3 is crucial—aim for moisture to reach 6 inches deep. I use a soil probe or just dig a small hole to check. After that, stick to your 1-2 times per week schedule, but always water slowly to let moisture penetrate rather than running off. Shade plants need consistent moisture, but soggy soil leads to root rot. A drip irrigation system works perfectly for this.
Pro Tips for Flower Bed Under Tree
- A few simple strategies will help you create a lush, low-maintenance flower bed that thrives under your tree all year.
- Soil Preparation Secret: In Step 1, don't just spread compost—mix it thoroughly into the top 4 inches of soil.
- Plant Spacing Strategy: When layering plants in Step 2, think about their mature size, not just their current size.
Frequently asked questions
Got questions about creating a stunning flower bed under tree? You’re not alone! Here are answers to the most common concerns—from timing to troubleshooting—to help you design with confidence.
What are the best shade-tolerant flowers for a tree bed?
Start with hostas, heucheras, bleeding hearts, and astilbes for low-light spots. For deeper shade, try ferns, impatiens, or foamflower. Avoid sun-lovers like marigolds—they’ll wilt fast! Layer perennials with annuals (e.g., begonias) for seasonal pops.
When is the best time to plant under a tree?
Spring (after last frost) or early fall (6–8 weeks before frost) are ideal. Avoid summer heat or winter cold, which stress plants. If planting in summer, water deeply daily for the first 2 weeks. Pro tip: Mulch heavily (3–4 inches) to retain moisture and suppress weeds.
Will my tree roots compete with flower bed plants?
Yes, but strategic planning helps! Plant flowers at least 3–5 feet from the trunk to avoid root competition. Use root barriers if needed, and opt for shallow-rooted perennials. Drought-tolerant varieties (like lamium) thrive with less water.
How do I keep the soil moist under a tree?
Mulch is your best friend—apply 3–4 inches of organic mulch (wood chips, bark) to lock in moisture. Water deeply 2–3 times per week (more in extreme heat). Drip irrigation under mulch works wonders. Avoid compacting soil when watering.
What if my flower bed looks sparse after a few years?
Thinning or deadheading spent blooms can revive it! Divide overcrowded perennials every 3–4 years. Add ground covers (like ajuga) to fill gaps. If soil is depleted, top-dress with compost in early spring. Troubleshoot: Yellow leaves? Check for root-bound plants or fungal issues (like powdery mildew).
Still stumped? Drop your specific challenge in the comments—we’re happy to help!
Wrapping up and next steps
Creating a flower bed under a tree is a rewarding way to bring life to shady spots while keeping your garden vibrant year-round. By carefully selecting shade-tolerant plants and layering them for texture and color, you’ll transform even the trickiest spaces into lush, low-maintenance beauty.
Remember, the key is patience—let your plants establish themselves, and soon, you’ll enjoy a thriving, ever-changing garden oasis. 🌿✨
Ready to get started? Grab your tools, sketch a simple design, and begin with the easiest, most resilient plants—your future shade garden will thank you! For extra inspiration, snap photos of your progress and share them with fellow gardeners for tips and encouragement.