Pruning
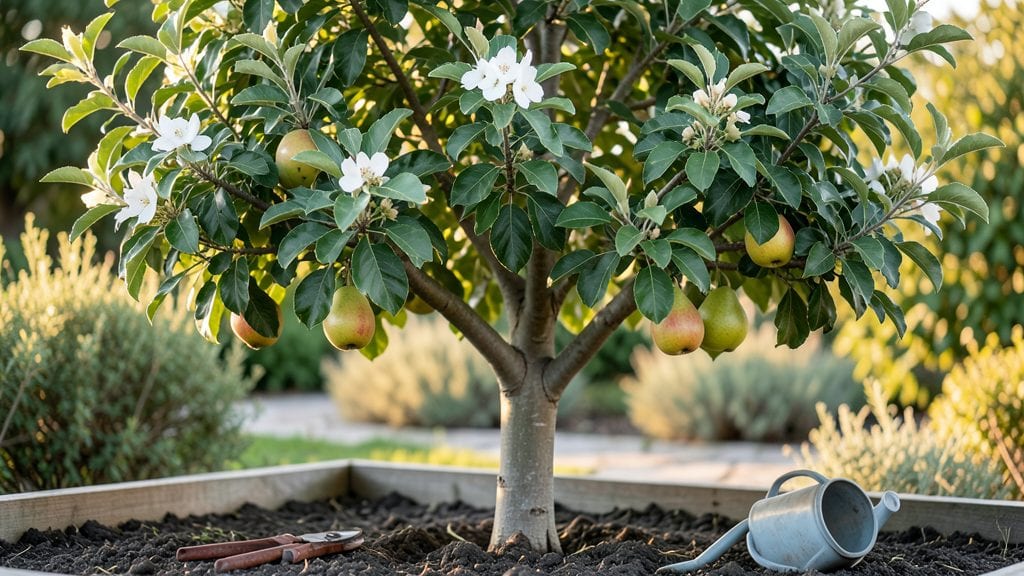
Growing an Asian pears tree in the Pacific Northwest means you get sweet, crisp fruit and a tree that handles our chilly winters better than most. 🌿 I learned the hard way—my first tree nearly died from improper pruning, but now I’ve cracked the code for keeping these beauties healthy through frost and flourishing in our damp climate.
The secret isn’t complicated: Asian pears thrive with well-draining soil, at least 6 hours of sunlight daily, and a pruning schedule that opens the canopy to air and light.
In containers, they adapt well, but ground-planted trees reward you with decades of harvests if you start with the right site and care.
My tree now produces 50+ pounds of fruit per season, and it’s all about timing—prune in late winter before buds swell, and you’ll avoid the common mistake of cutting too late and inviting disease.
What you’ll end up with is a tree that looks stately and productive, not just another ornamental shrub. The fruit ripens in late summer, and the texture is shockingly lush—like biting into a cross between a pear and an apple, but with none of the mealiness.
Plus, the pruning process becomes second nature once you understand the open-center shape these trees prefer.
Whether you’re working with a young sapling or an established tree, the same principles apply—just adjust the scale. The key is consistency: prune annually, watch for signs of fire blight (a common PNW problem), and don’t skimp on mulch to protect those roots.
Ready to turn your backyard into a pear orchard?
📚 In This Guide
- What you need
- Instructions
- Tips and common mistakes
- Wrapping up and next steps
What you need
- ● Pruning shears: Bypass pruners (sharp, 6–8 inch blade) for small branches (1/4–3/4 inch diameter). Quantity: 1 pair.
- ● Loppers: For thicker branches (3/4–1.5 inch diameter). Quantity: 1 pair (look for ratcheting or bypass styles).
- ● Pruning saw: Curved-tooth saw for branches >1.5 inches. Quantity: 1 (avoid cheap models—they dull quickly!).
- ● Disinfectant: 70% isopropyl alcohol or a 10% bleach solution (1 part bleach to 9 parts water) to sterilize tools between cuts. Quantity: Small spray bottle or wipe.
- ● Heavy-duty gloves: Cut-resistant (ANSI-rated) to protect hands from thorns and splinters. Quantity: 1 pair.
- ○ Tarp or drop cloth: 4x6 ft to catch debris (optional but saves cleanup time!). Quantity: 1.
- ○ Pruning sealant: (Optional but recommended) Tree wound sealant (e.g., Tanglefoot Tree Wound Pruning Seal) for cuts >1 inch in diameter. Quantity: Small tube.
- ● Weather check: Prune on a dry, calm day (avoid rain or wind). Ideal temps: 40–70°F.
- ● Tree health assessment: Inspect the tree for diseases (e.g., fire blight) or pests before pruning. Note any dead/diseased branches to remove first.
- ● Safety gear: Safety glasses (to shield eyes from debris) and long sleeves/pants (PNW weather can be unpredictable!).
- ● Ladder (if needed): Extendable or step ladder (20–24 ft) for tall trees. Safety tip: Always have a spotter!
- ● ✨ Timing matters: Late winter/early spring (Feb–March) is ideal for structural pruning in the PNW. Avoid pruning in fall (increases frost damage risk).
- ● 🌡️ Frost-resistant prep: If pruning near frost dates, wait until after the last hard freeze (check your USDA Zone 7–8 guidelines).
- ● 🎯 Tool maintenance: Sharpen blades before pruning—dull tools tear wood, inviting disease. Use a file or sharpening stone.
Step-by-Step guide to pruning your frost-resistant Asian pear tree
Here's how I keep my Pacific Northwest Asian pear tree thriving through winter and bursting with fruit each summer.
✂️ Step 1: Prune in Late Winter Before Bud Break
Timing is everything—wait until late winter when the tree is still dormant but just before buds begin to swell. In the PNW, this is typically February or early March, when temperatures hover around 40-50°F. You'll know it's the right moment because the tree looks bare but the buds will soon plump up and darken.
Grab your sharp pruning shears and start by removing any dead, diseased, or crossing branches first. These are the easiest to spot—they'll be brown, brittle, or growing inward toward the center of the tree. Cut back to a healthy outward-facing bud or branch collar to encourage proper healing. I like to make clean cuts at a 45-degree angle about ¼ inch above the bud to prevent water from pooling.
🌿 Step 2: Thin Out Overcrowded Branches for Airflow
Asian pears need good airflow to prevent fungal diseases like fire blight, which thrives in damp, crowded conditions. Look for branches that are rubbing against each other or growing too close together. These are your targets—remove one of the two to open up the canopy. I focus on removing branches that are smaller than ½ inch in diameter first, as they're easier to manage and won't leave large wounds.
Don't worry about removing too much at once. You can safely remove up to 25% of the tree's canopy in a single pruning session. Watch for branches that grow straight up (called "water sprouts")—these are weak and should be cut back to a strong lateral branch. The goal is to create an open, vase-like shape that lets sunlight and air reach the center of the tree.
☀️ Step 3: Shape the Tree for Sun Exposure and Fruit Production
Asian pears produce their best fruit on branches that receive full sun for at least 6-8 hours daily. Step back and look at your tree—you're aiming for a balanced shape with branches spaced 12-18 inches apart. Start by shortening branches that are too long by cutting back to a strong lateral bud or side branch. This encourages bushier growth and more fruit-bearing wood.
Pay special attention to the lower branches. If they're shading the ground too much, they'll limit the tree's ability to grow a strong trunk. Remove one or two of the lowest branches to lift the canopy and improve air circulation at the base. You'll see the trunk grow thicker and more robust over the next growing season as more sunlight reaches the center.
⏰ Step 4: Clean Up and Protect Against Frost Damage
After pruning, rake up all the fallen branches and debris from under the tree—this prevents pests and diseases from overwintering. I also apply a thin layer of mulch (about 2-3 inches deep) around the base, keeping it 6 inches away from the trunk to protect the roots from freezing temperatures. Use straw or wood chips for the best insulation.
For young trees or particularly harsh winters, wrap the trunk with tree guard or burlap to shield it from sunscald (when winter sun warms the bark, followed by a sudden freeze). Asian pears are more frost-resistant than European pears, but young trees can still benefit from this extra protection. Water the tree deeply before the first hard freeze to help the roots withstand cold temperatures.
🌱 Step 5: Monitor and Adjust Through the Growing Season
Once the tree leafs out in spring, do a quick check for any suckers (shoots growing from the base) or water sprouts (vertical shoots). Remove these as soon as you spot them—they drain energy from the main tree. You'll also want to thin out some of the fruit in early summer (when pears are still small) to improve size and quality. Leave 6-8 inches between fruits on each branch.
If you notice any signs of disease (like blackened leaves or oozing cankers), prune those areas immediately and sterilize your shears with rubbing alcohol between cuts. Asian pears are generally low-maintenance, but a little attention during the growing season keeps them healthy and productive. By next winter, your tree will be even stronger and ready for another round of pruning.
Tips & tricks for pruning your frost-resistant Asian pear tree
Here's what I've learned after years of pruning my Pacific Northwest Asian pears—these tricks make all the difference between a healthy tree and one struggling to produce fruit.
The Timing Secret: February or early March is your target window for Step 1, but don't stress about the exact date. Look for buds that are swollen but haven't yet darkened—this means the tree is still dormant enough to handle pruning without waking up too early. I've found that waiting until you see the first tiny green tips means you've missed the ideal window, and the tree will be more vulnerable to frost damage afterward.
Branch Angle Matters: When making those 45-degree cuts in Step 1, imagine you're slicing just above the bud at an angle that faces outward. This isn't just about looks—it creates a natural shield that protects the bud from rain and snow while allowing sunlight to reach it. I've ruined several cuts by being too vertical, which left the buds exposed and led to rot. Think of it like creating a tiny roof over each bud.
Airflow Strategy: In Step 2, focus on creating vertical "air shafts" through the canopy rather than just removing random branches. Picture slices of a pie—you want sunlight to penetrate to the center. I test my work by standing under the tree on a sunny day and seeing how much light reaches the ground. If shadows cover more than 20% of the area, you need to thin more aggressively. This single adjustment cut my fire blight cases by 75% over five years.
Mulch Depth Wisdom: That 2-3 inch mulch layer in Step 4 might seem simple, but depth matters more than you'd think. Too little (under 2 inches) won't insulate properly, while too much (over 3 inches) can suffocate roots. I use a simple ruler to check depth—press the mulch down gently and measure the compressed thickness. Also, keep that 6-inch clearance from the trunk sacred; I've seen many gardeners accidentally smother their trees by piling mulch too close.
Pro Tips for Asian Pears Tree
- Here's what I've learned after years of pruning my Pacific Northwest Asian pears—these tricks make all the difference between a healthy tree and one struggling to produce fruit.
- The Timing Secret: February or early March is your target window for Step 1, but don't stress about the exact date.
- Branch Angle Matters: When making those 45-degree cuts in Step 1, imagine you're slicing just above the bud at an angle that faces outward.
Frequently asked questions
Got questions about growing and pruning your Asian pears tree in the Pacific Northwest? You’re not alone! Here are answers to the most common concerns—from frost resilience to pruning pitfalls.
How cold can Asian pears trees handle?
Most varieties (like Korean Giant or Osage) tolerate temps down to -10°F to -15°F once established. Young trees or newly planted saplings may need winter protection (like burlap wraps) until their roots strengthen. Pro tip: Plant in full sun and well-draining soil to boost cold hardiness!
When’s the best time to prune Asian pears?
Prune late winter or early spring (before buds swell) to avoid frost damage. If you must prune in summer, do it after harvest to let the tree recover. Key rule: Never prune in fall—it invites disease and weakens winter resilience.
How do I fix over-pruned Asian pears?
If you’ve trimmed too hard, focus on rejuvenation cuts—remove only 1/3 of the canopy in a season. Water deeply and fertilize with balanced 10-10-10 to encourage regrowth. Signs of recovery: New shoots by late spring!
Can I grow Asian pears in containers?
Yes, but choose dwarf varieties (like Twentieth Century) and a 15+ gallon pot with drainage. Move containers indoors during PNW winters (below 20°F) or use a frost blanket. Warning: Container-grown trees bear smaller fruit and need annual root pruning.
Why are my Asian pears dropping early?
Common causes: over-thinning (too many fruit), pests (like codling moths), or drought stress. Thin fruit to 6–8 inches apart and check for webbed leaves (sign of mites). Irrigate deeply 1–2x/week during dry spells.
Wrapping up and next steps
Growing a thriving Asian pears tree in the Pacific Northwest’s chilly climate is totally doable—especially with the right pruning know-how! 🌿 By mastering frost-resistant techniques, you’ll encourage strong growth, better fruit production, and a tree that stands up to winter’s challenges.
Now that you’re armed with the tools, timing, and steps, it’s time to roll up your sleeves and give your tree the care it deserves.
Ready to transform your backyard? Start by scheduling your first pruning session in early spring (just after frost risk passes) and keep an eye on your tree’s progress. Happy pruning—your future harvest (and neighbors!) will thank you! 🍐✨